Last week I shared our newer clock that got an
‘older’ look with the diy chalk-finish paint from Lowes
I promised to share more about how I achieved the look
in a separate post.
It really was a simple project with just a few steps
The chalk-finish paint recipe from Lowes is as follows
Here’s what you need:
(instructions courtesy of Lowes)
Valspar Signature Latex flat or Valspar paint with built-in primer (your choice of color)
Plastic paint buckets (small unless doing a wall)
Stir sticks
Plaster of Paris
Plastic measuring cup (do not re-use for food)
Water (use cool- not warm)
What to do:
Mix 1/3 cup Plaster of Paris with 1/3 cup cold water in a mixing cup
Stir until completely smooth. Mix with 1 cup latex paint and mix completely.
Makes enough chalk-finish paint for one coat for a 6 drawer dresser. Should not be stored and re-used. For small projects- mix less using these same proportions. Nontoxic: to dispose – let dry completely in the container before disposing in trash.
After following the recipe and mixing up your paint-
putting down protectors from paint drips for your floor~
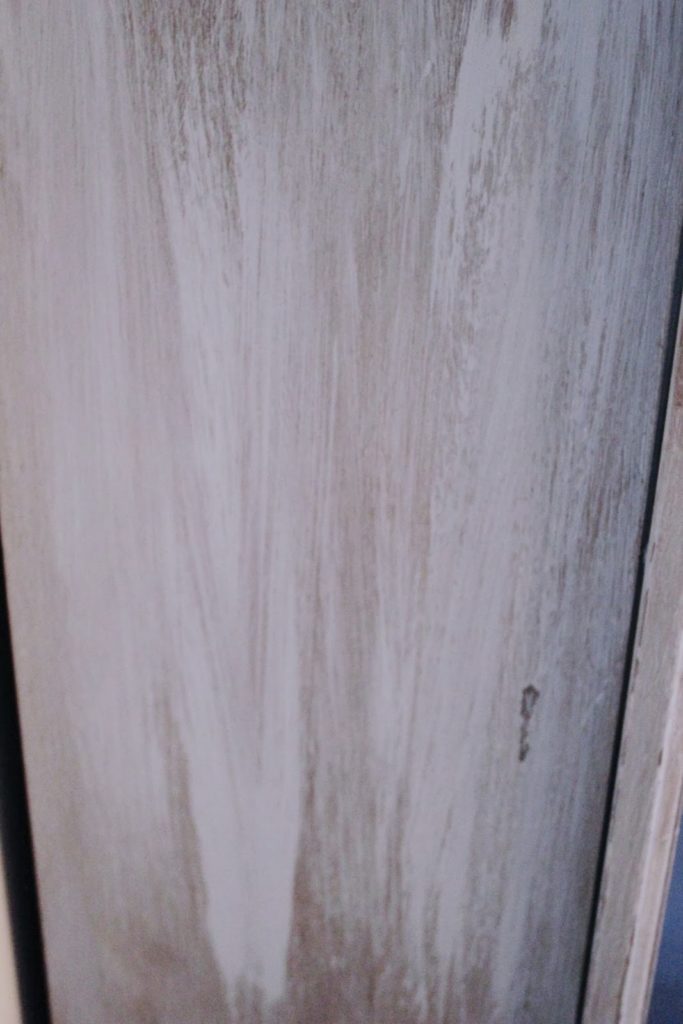
The first step
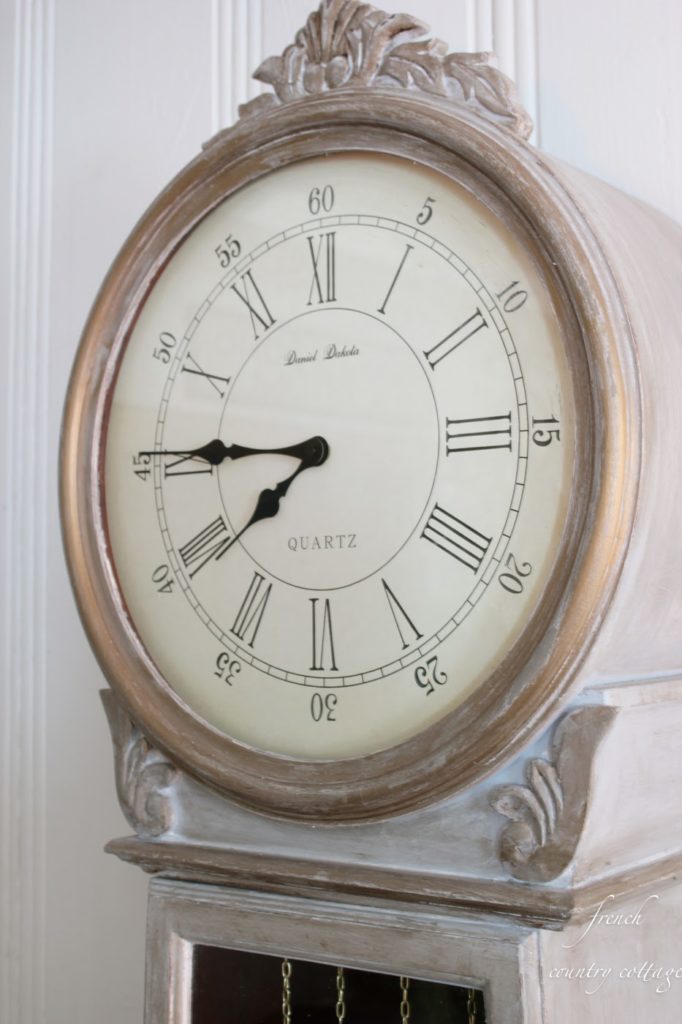
is to simply paint your piece with your base coat
(for the clock – I used Pantone Barely Blue mixed into Chalk-finish paint)
Repeat as many coats of paint
as needed to cover the paint or finish underneath
When dry
I added a layer of dark stain wax to ‘antique’ the finish
You can use any type of antiquing medium that you like-
I have a can of a gel type wax that I have had for years
but you can also use a favorite wax or liquid from the hardware store
(they are in the paint section or ask for help with finding the perfect one)
(they are in the paint section or ask for help with finding the perfect one)
or you can use an antiquing gel from the craft store
which has quite a few different types available.
which has quite a few different types available.
Just remember that some things- like stains – can be dangerous
and need to be used and cleaned up properly
I had a friend in grade school whose house caught fire after piled up rags that had
stain on them ignited on their own in the garbage
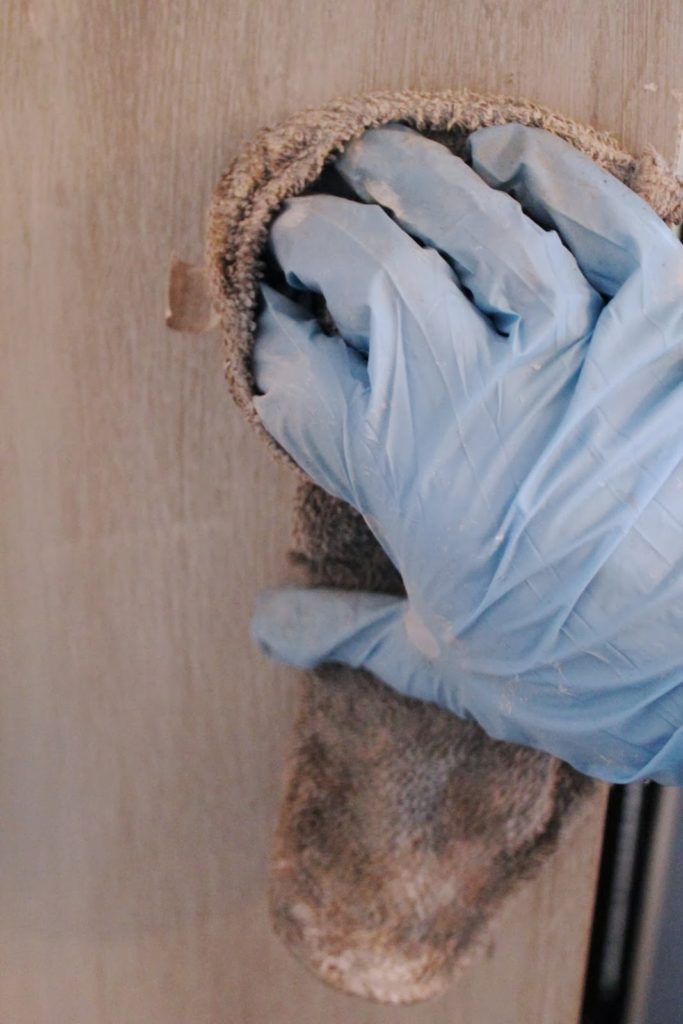
I used an old rag and wiped the dark stain wax all over the clock
The finish will be streaky- so you will need to keep rubbing it in
or wiping it off or adding more to even it out
Once you are happy with the ‘antiquing’ it’s time to add some of the finishing touches
with a little bit of bling and gold paint.
I used a small craft gold paint for the ‘guilding’
I have used FolkArt brand or DecoArt and they are both good
and have a darker brassy gold as well as glimmering lighter gold to choose from
so you can pick which one you would like.
This is an ‘Antique Gold’ which is more brassy and dark
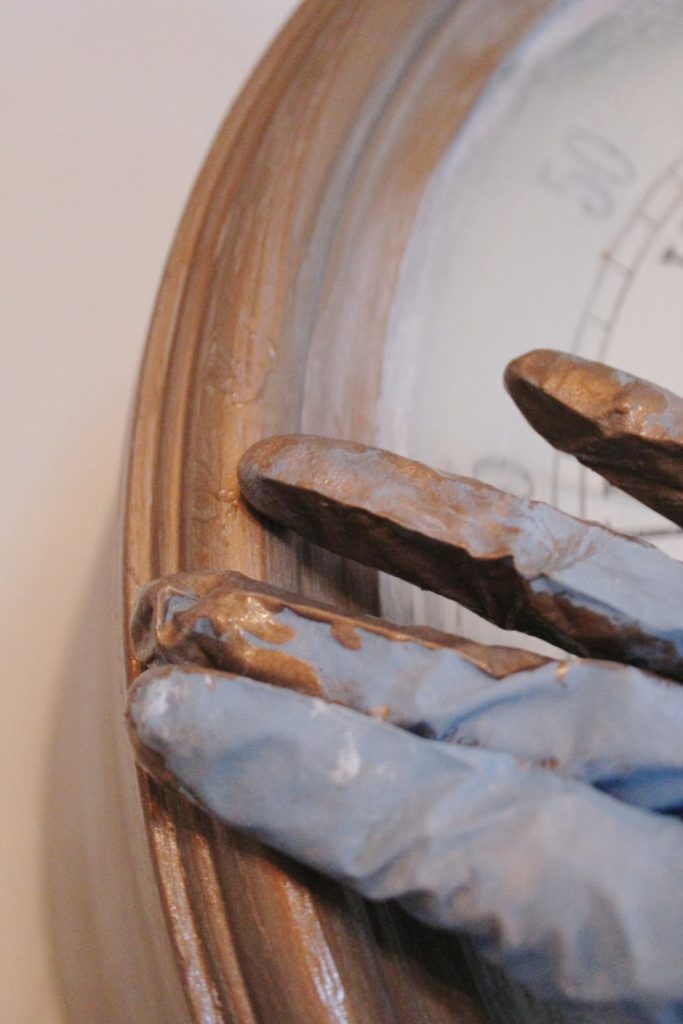
I grabbed a fresh pair of gloves and used my fingers to simply rub
the paint on the areas I wanted to be gold- mainly because for the first coat of gold wanted it to
be very thick and not streaky
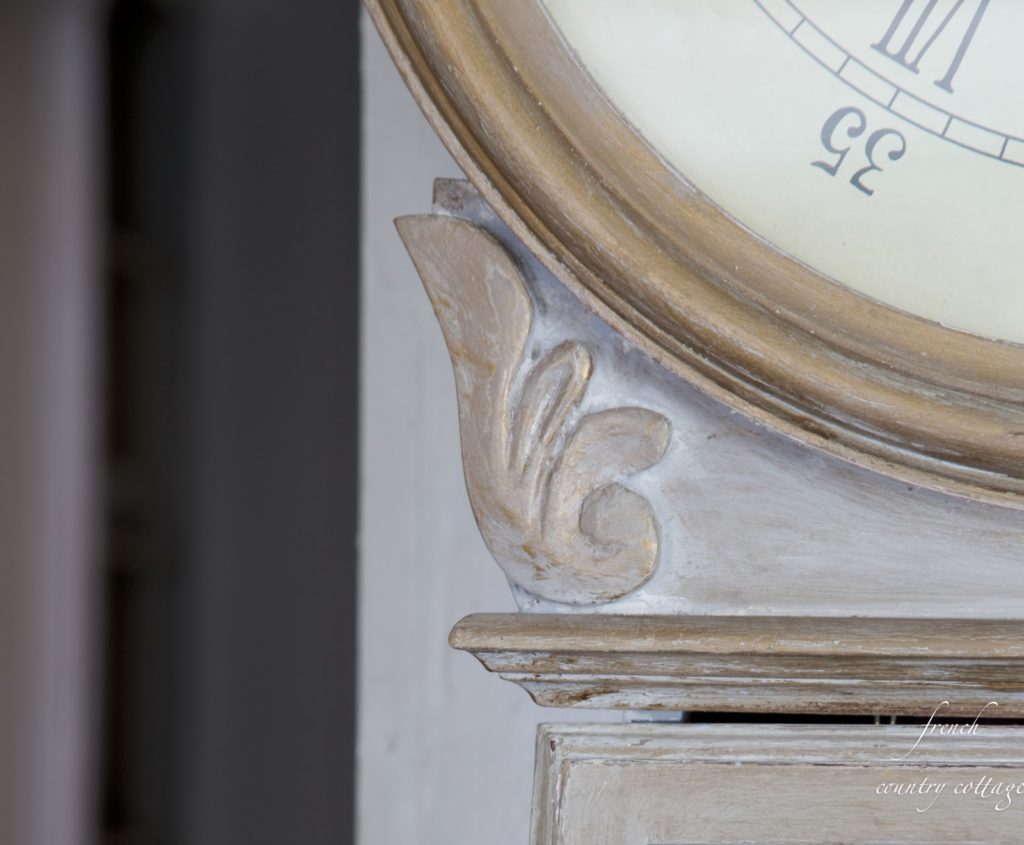
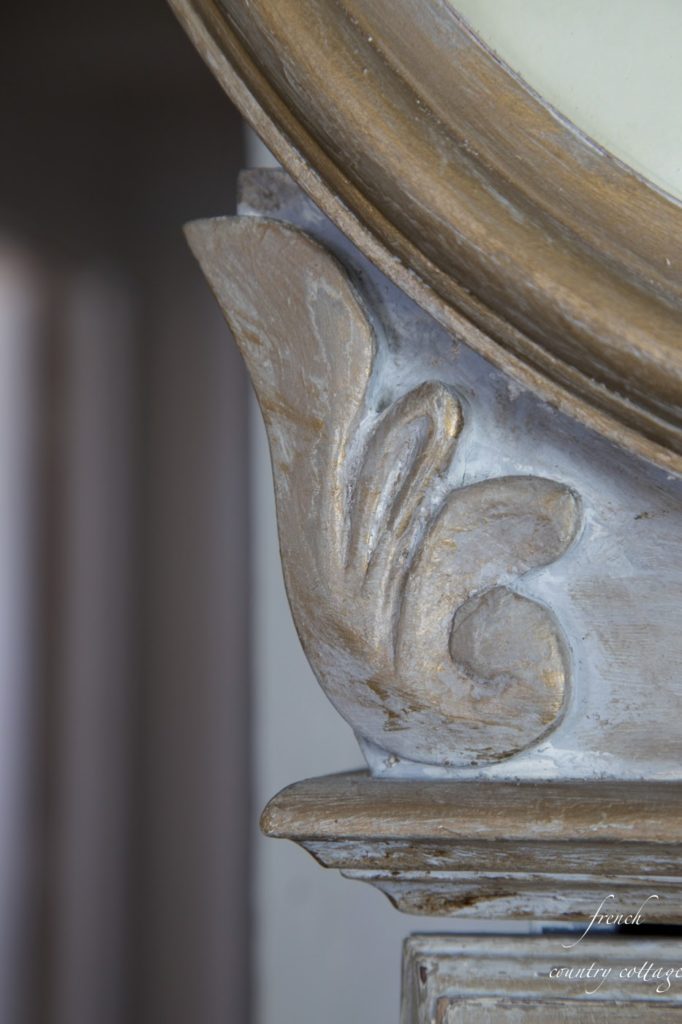
I chose to highlight details like the carvings
and the edge moldings along the base of the face of the clock and bottom
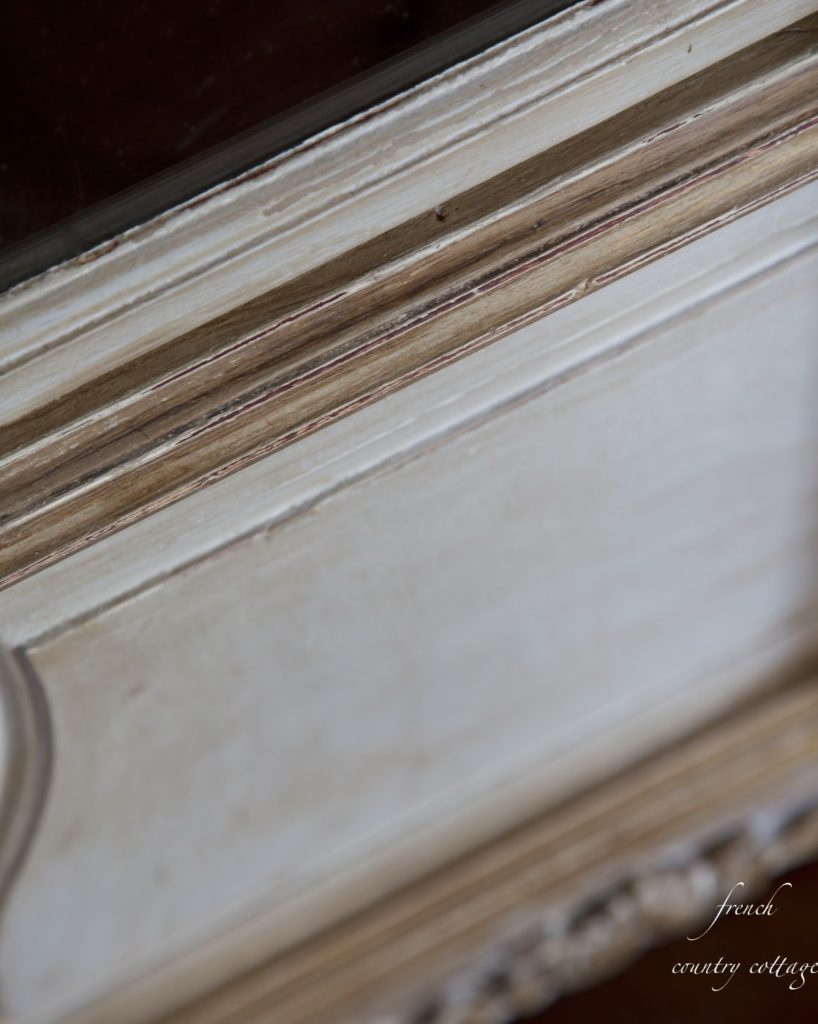
After you have put the Midas Touch on your piece 😉
it’s time to distress and age it further by sanding down some of the edges
and areas to really help bring some ‘age’ to it

Make sure the paint is all dry, grab a dust mask and then sand the areas that would
naturally show some ‘wear’ such as the door area
the edges of the carvings, etc.

It’s a messy job
But… it does help achieve the ‘look’
After you have sanded – wipe down your piece to remove
the dust and grunge
and then get ready to be
almost. finished.
I know. almost.finished. but for me- not quite.
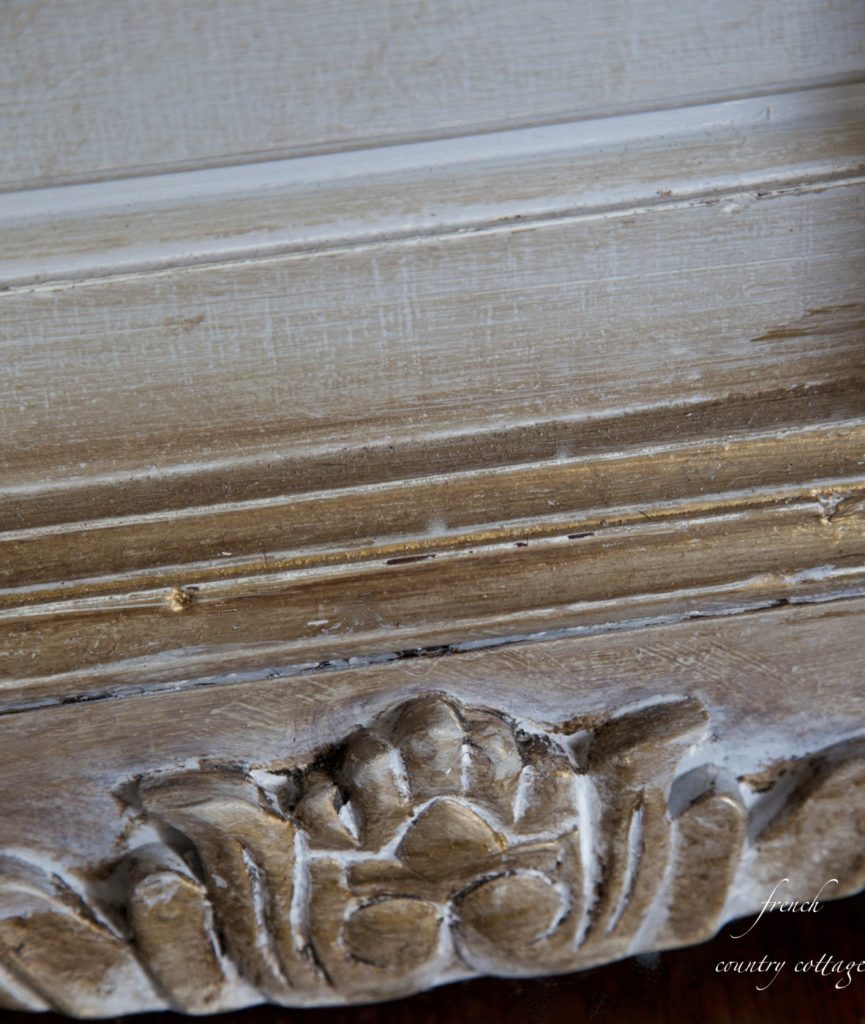
I like to go back over the piece to make sure there doesn’t need to be
a little bit more gold or a little more antiquing
Sometimes overzealous sanding can remove too much
and so I add it back if need be.
Note: I did use a craft brush to apply the second coat of gold
Clean up any paint messes on the glass, etc. and then
Step back, look at your gorgeous piece and smile.

I hope that answers questions and helps with your own projects!
Please remember to use all safety equipment in your project
and dispose of or clean any rags or pieces properly-
as instructed by the manufacturer
sharing at wow
Enter your email address:
Delivered by FeedBurner
WELL DONE- it really looks wonderful.
Yay! I was waiting (sort of) patiently for this post. Thank you so much for sharing the how to's. 🙂
Beautiful! I love the subtle gold tone against the light blue. A gorgeous clock!
I love how it turned out! Absolutely beautiful!
That is a beautiful clock and I really like what you did to it.
Love the way this turned out. Beautiful mix of colors and antiquing. Well done!
Absolutely gorgeous, Courtney!!!!
xoxo laurie
Courtney, this is absolutely BEAUTIFUL!! Great job with all the layering and antiquing! It is a gorgeous clock, and you should be very proud and excited about it. Thanks so much for sharing the great tutorial. I have a few pieces I'm thinkin' of, that would look great like this☺–♥Angie
Very pretty and thanks for all the details of how you did this.
Judy
I read this a few days ago. I am redoing a small guest bathroom. Maybe tiny is a better word. The problem was mirror placement. My contractor added wainscoting and great moldings for me. I have that beachy look going here. But the mirror was a thorne in my side. He needed the final answer today. So I woke up early, grabbed an old mirror that was a brassy gold plasticy frame. But very sturdy and at least 30 years old. I remembered what you did and I did the same thing. Took the bright white paint, covered the whole thing. Then took the gray paint from the bathroom walls and painted all the scrolling in the corners and the egg& dart design on the frame inner edge. Then dry brushed the same gold paint you used over the gray as simple highlight and accents. I just converted my contractor!! He could not believe what I did while he was working. Tomorrow he installs it and it will be great. Thanks for sharing!! It added another element to the bathroom that was in danger of being too straight and one dimensional.
How so very beautiful and you did an incredible job…thanks so much for sharing how you achieved this gorgeous look!
This technique is great I have a desk I'm going to use it on, wish me luck!
I'm going to use this technique on a french provincial desk I have, wish me luck!
So pretty, Courtney. I've made my own chalk paint with plaster of paris, too, and been happy with the results.
Thanks for sharing how you achieved the look. It's amazing.
Thanks for this Courtney! I've got this same exact clock and have been waiting for inspiration to paint it!
The only thing about this clock that I don't like is setting the time using the instructions. It's a bear to do!
But otherwise, the clock is beautiful and you did a wonderful job!!!
So, so pretty! I love how your clock turned out. Thanks for the tutorial! ~Deborah
Hi, I know I'm coming to this awesome project a little late – like two years – lol but I have a question. You didn't do anything to the inside. Have you done it since and if not why not? Thanks.