There is no way around it- outdoor furniture takes a beating.
Fabrics fade. Paint will bubble and peel in sunshine
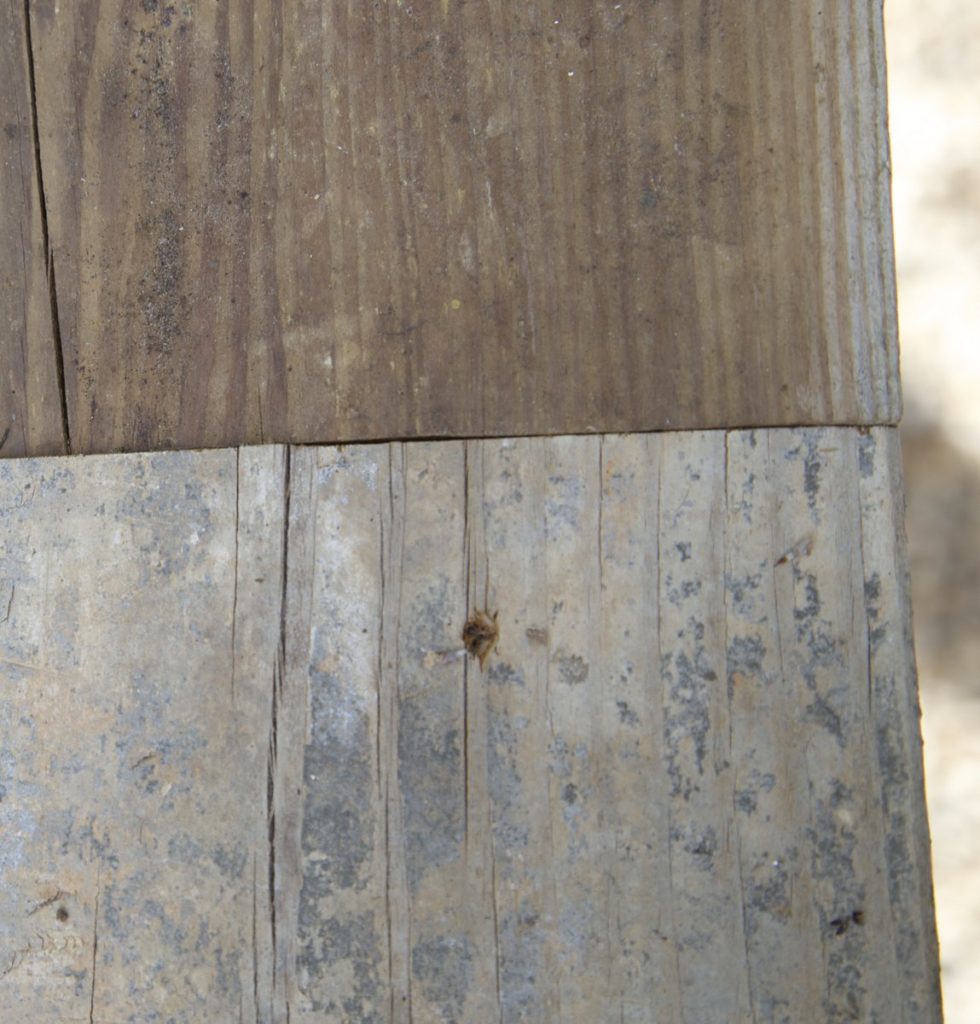
and you know what happens to long flat boards when they are left outdoors?
Yep, they twist.
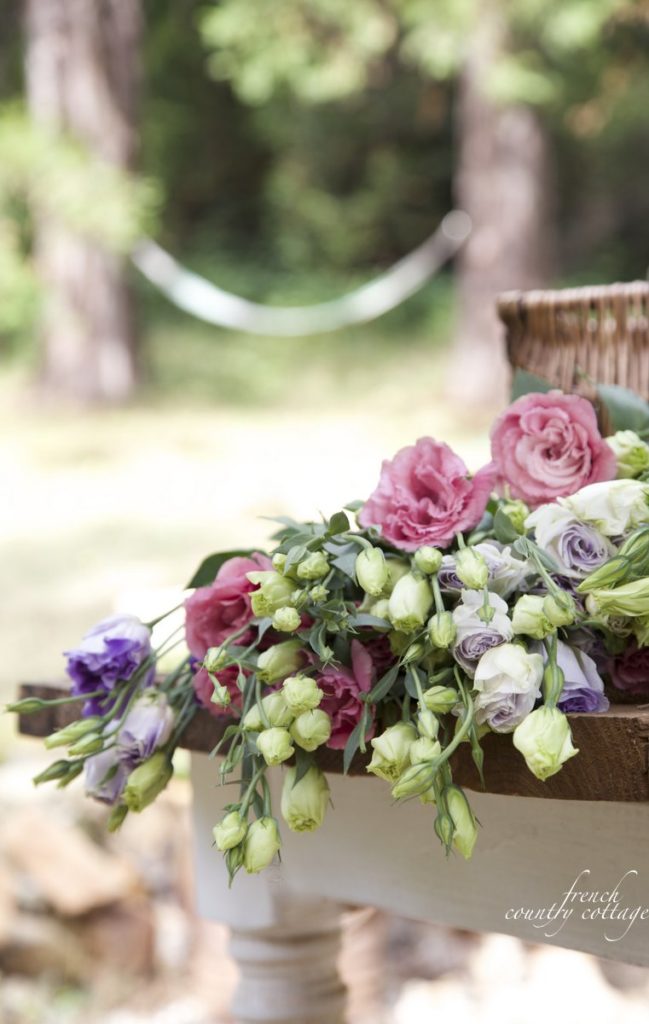
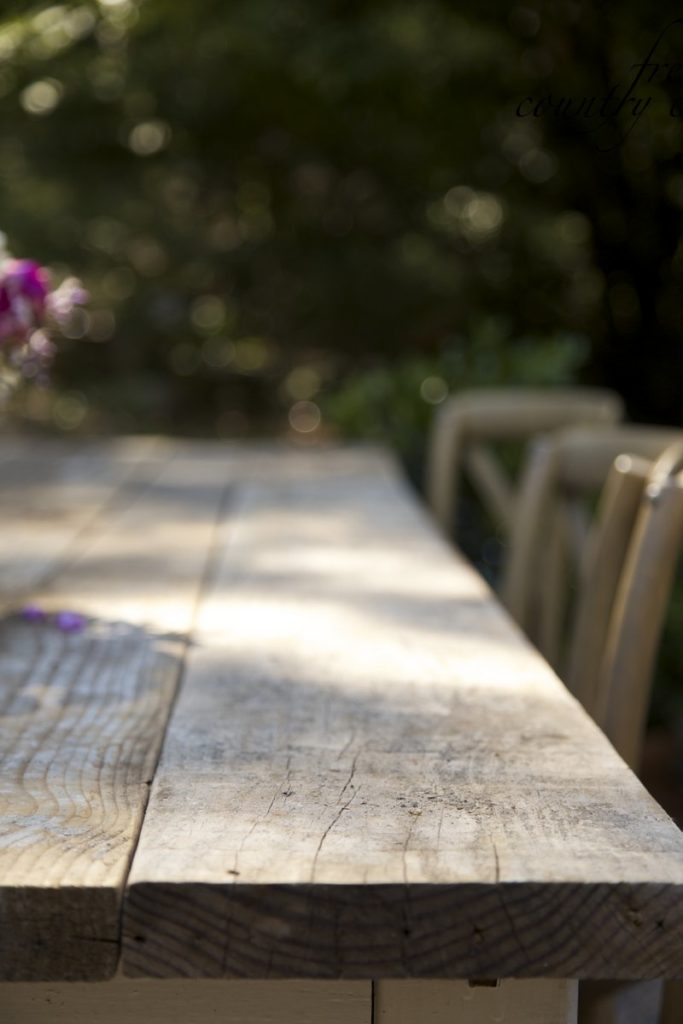
Our outdoor table is a big, long, farmhouse table with
chunky legs, lots of worn paint and a planked table top made from 10′ long boards.
We have had it outdoors for a couple of years now- with no issues but last winter-
when we moved the seating area under the covered patio- we left that table under the pergola
and forgot about covering it when it rained.
Apparently, that rain was just enough to cause a little bit of an issue.
Then add in some strong sunshine and those boards started to twist a bit.
Then they continued until the little twists turned into a big warped mess.
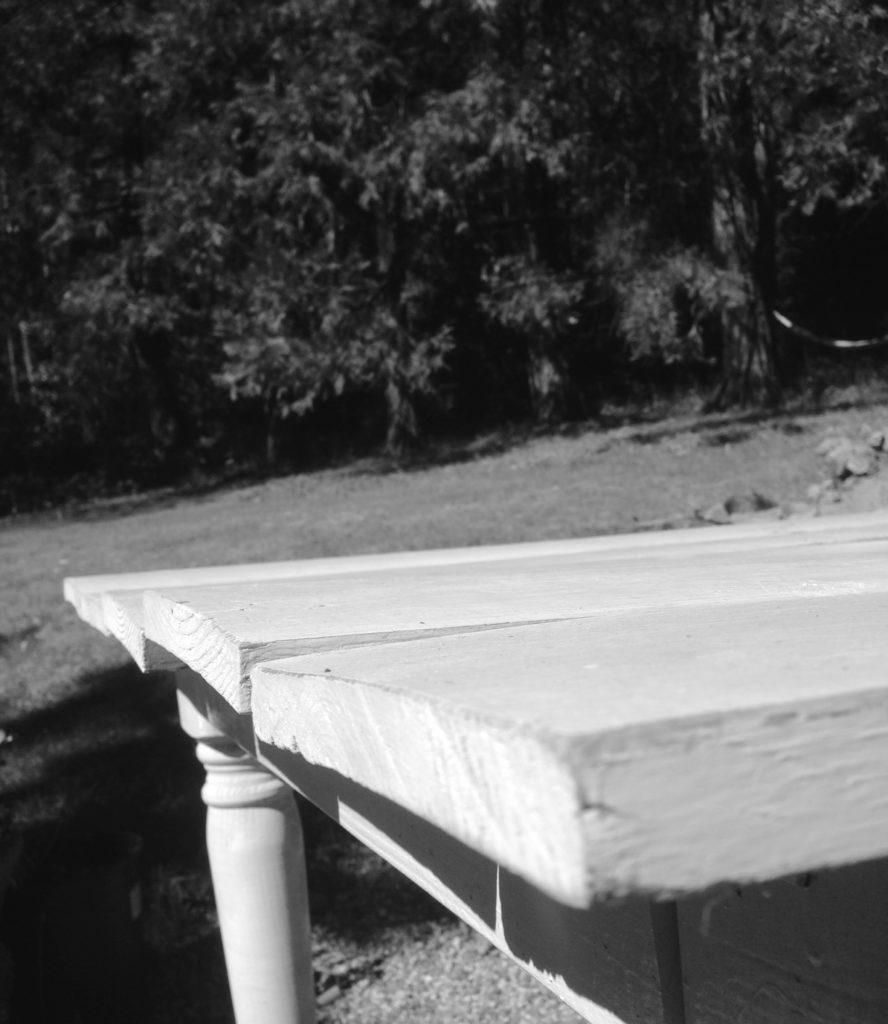
Yeah.
Not really exciting for dining or for a table setting
and try to place a plate or glass of water on it.
So it was time for a new table top and I knew just what I wanted.
I scoured the Re-Store and craigslist for chunky weathered old wood that would be perfect for the table- to no avail.
But then one morning, I found a pile of boards in an unexpected place.
But then one morning, I found a pile of boards in an unexpected place.
You can read more about that in this post HERE
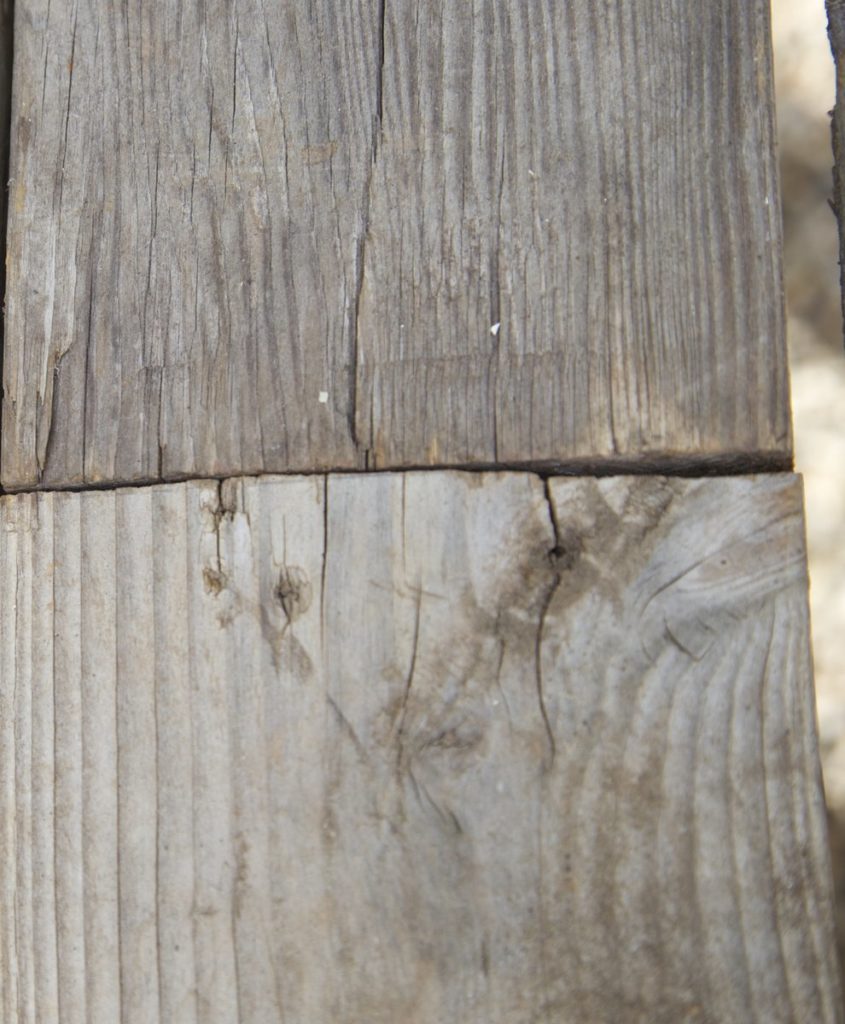
The boards were perfect in nearly every way.
They were chunky and weathered.
They were worn.
They showed old marks and had a perfect silver weathered finish.
I was in love and dancing up and down at finally finding them
Plus- the price- pretty amazing.
Free.
Plus- the price- pretty amazing.
Free.
The only issue?

This table is nearly 10′ long- and none of the boards were longer than 8′
and some of them were only 3-4′ long.
So that meant that we needed to tinker a bit with the frame to get them to work.
Which was fine with me- I actually loved the idea that the boards would look more like
an original vintage handmade piece where people used what they had on hand to make something.
Which was fine with me- I actually loved the idea that the boards would look more like
an original vintage handmade piece where people used what they had on hand to make something.
For those of you who asked- here’s how we made the top:
The first step was to lay out the boards to get the right pattern of widths and lengths
It’s really whatever you like the look of together- there is no magic formula
I went with one of the longer 8′ boards on the edge to start because
I wanted a smoother finish for the side
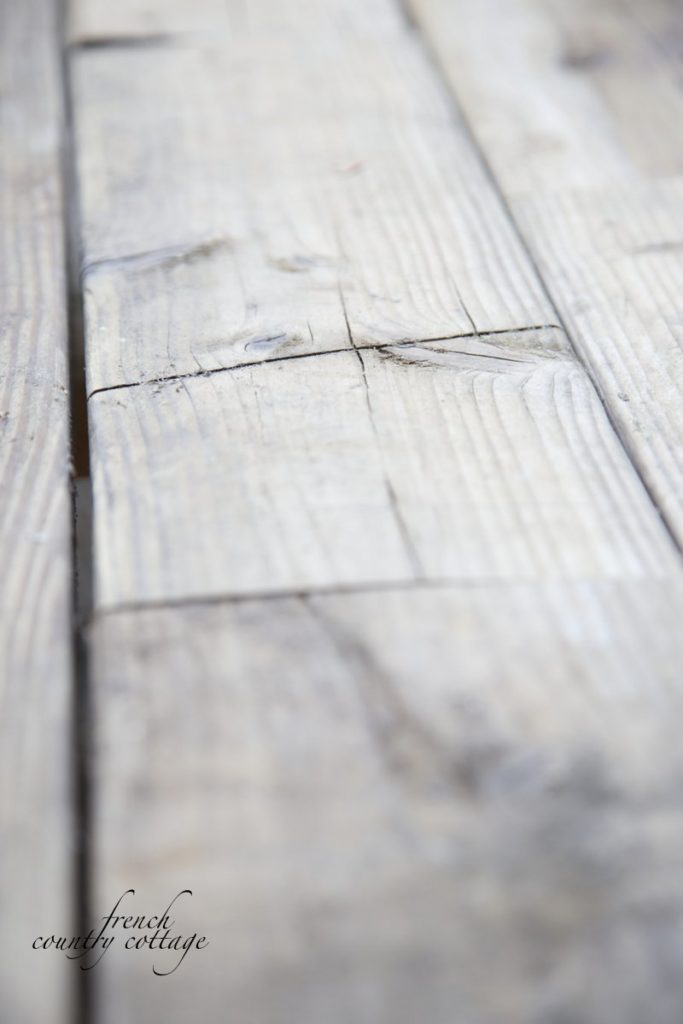
You can see that the boards do not go all the way from one end of the table to the other
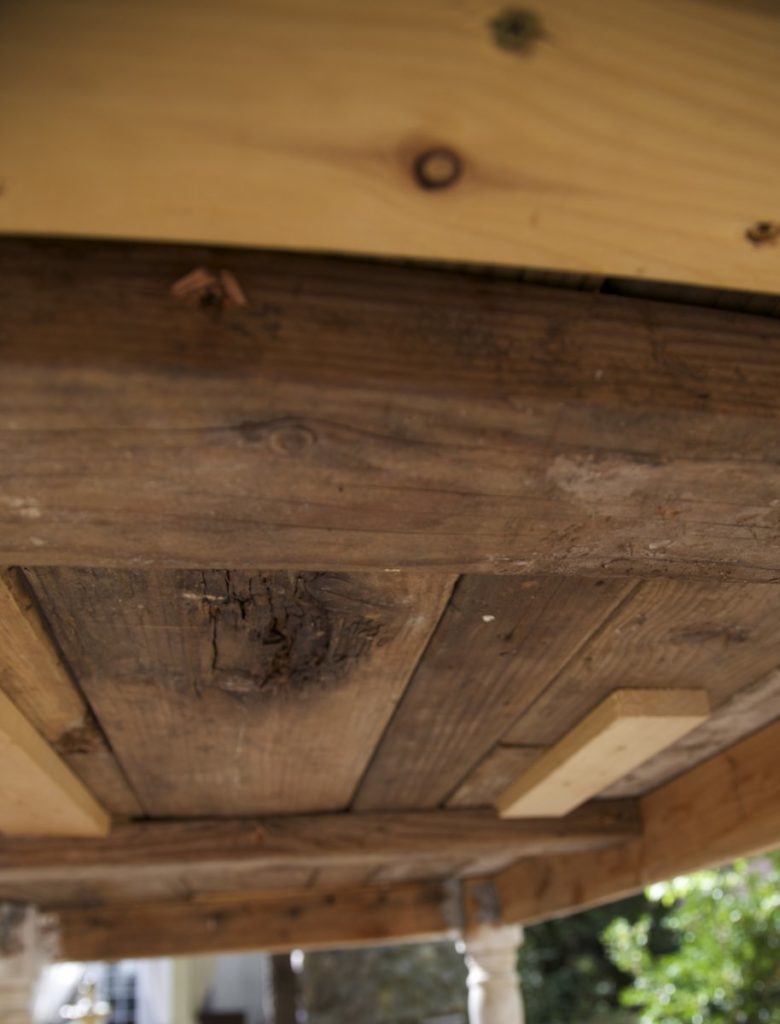
So we needed to add a support in several areas underneath.
so that is where the extra work came in.
If you have boards that run the full length- it would be much easier to make the top.
If you have boards that run the full length- it would be much easier to make the top.

It’s hard to tell from the photo and the next but this is looking width wise-
the main support piece of pine 2×4 is running from one side to the other- not one end to the other- if that makes sense.
Since there were going to be several supports added underneath- we tried to somewhat line up the boards that were meeting in the middle so to speak – but not next to each other.
The support was simply a scrap piece of 2×4 that gave the boards a place to meet and be secured.
Normally on a table- you might have one or two support bars running across in the middle
and then the boards resting on each end or ‘head’ of the table area.
and then the boards resting on each end or ‘head’ of the table area.
Since this table is 10′ long- and it has those not full length boards-
this table has 3 support boards running across it to accommodate the random lengths.
this table has 3 support boards running across it to accommodate the random lengths.
For some of the others that didn’t quite make it to the support boards
we simply used another scrap piece of wood to ‘connect’ the boards together.
we simply used another scrap piece of wood to ‘connect’ the boards together.
See those small 1×3′ yellow pine boards? They are connecting the two different lengths and keeping them together while adding a little bit more strength.
You could of course use a bracket or something else instead of boards
we just happened to have extra small pieces of wood
that were a perfect size and fit on hand and so that’s what we used.
Secure the tabletop to the frame by using screws and L brackets if you like.
We went along with each board securing it to the frame and the supports as we went
Once you have all the boards secured to the table frame and supports
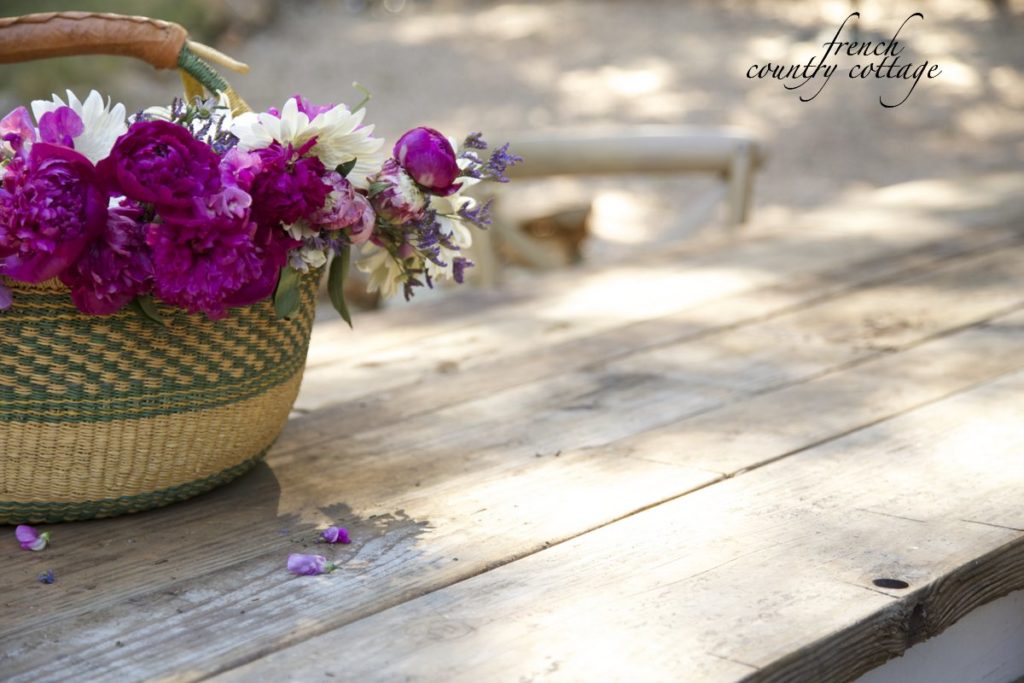
and any reinforcements in place- you can sit back and admire your work.
The finishes on the top don’t match- and there are some gaps- but I don’t mind at all.
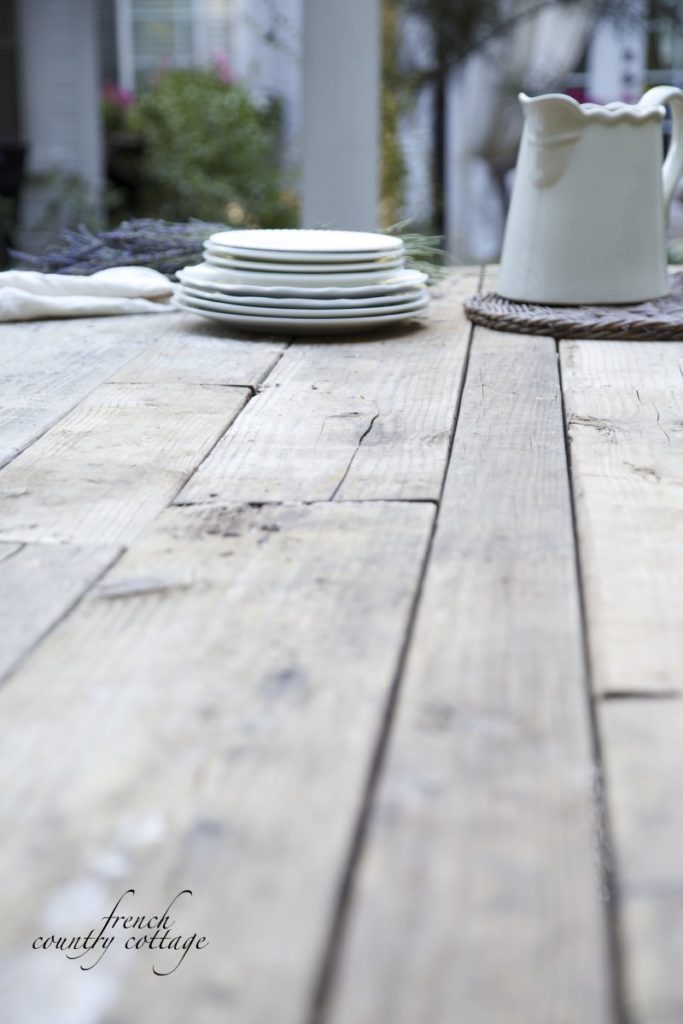
I love how the table turned out- and the old boards were perfect for it.
Plus, since they are so chunky and already seasoned- they will weather much better
Happy Tuesday!
sharing at sss

Enter your email address:
Delivered by FeedBurner
Beautiful! I love this, so pretty you almost don't want to plates on it and cover up those delicious boards!
Nice job! I admire all your effort to use those wonderful boards.
I adore your creative table story! It is pure beauty when it comes together as this. Your images are so gorgeous and inviting.
I love your blog so much!!
The table looks great!! I love a weathered look. Enjoy many happy times using the table. Blessings, Catherine
Great job on the table make over. And what can be better than free? 🙂
Turned out great Courtney!
Love the "NEW" table Courtney! It looks fabulous! Always love reading your great ideas…such a pretty style 🙂 Hope you are having a great summer!!
I saw your previous post, and enjoyed it. Love how you displayed the table with the flowers in this post, Courtney. You always do such an amazing job putting pieces together.
Debbie
xo
Bonjour chère amie,
Une table réussie !… Un travail de titan mais tellement valorisant !… Je vous félicite et je vous souhaite des repas heureux autour de cette table qui a une belle histoire.
Je vous souhaite un bel été.
Gros bisous ♡
Perfect addition to your French country cottage.
Love it as well, just picked me up some old job site scaffling boards with a perfect amount of white paint to them.
Will see what I conjure up?
A beautiful week to you Courtney.
Xx
Dore
Such a beautiful weathered grey. Lovely. xx
I've been wanting to make a table for the porch forever. This is such great inspiration! xo, N.G.
Looks marvelous! You were meant to find those boards — it turned out so well that it looks better than if you'd found all one length boards. Being on the shorter end they probably won't warp — that's certainly a plus. Beautiful flowers.
Can't beat the rustic look and that "price"….what fun you had getting them all to work! Great job..
Nancy
Just perfect. Perfect. I love it.
Blessings,
Spencer
Love the way this turned out, Courtney! My favorite price, too : )
Shout table turned out great!!!