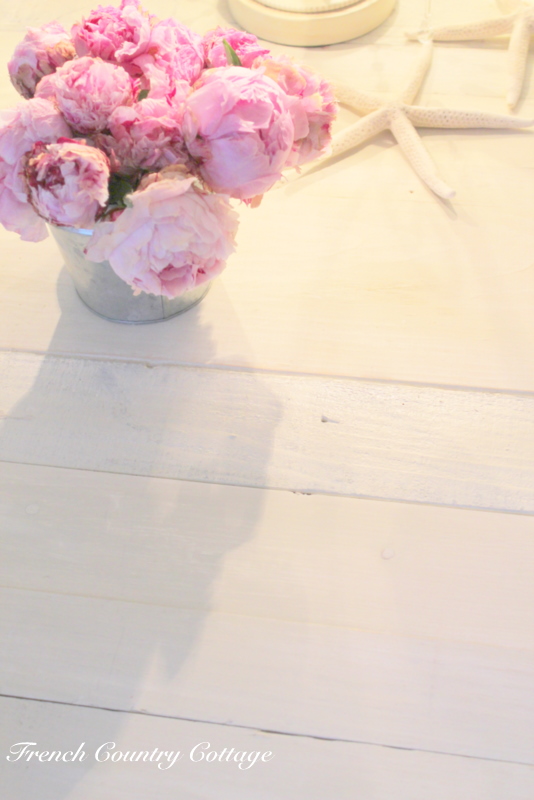
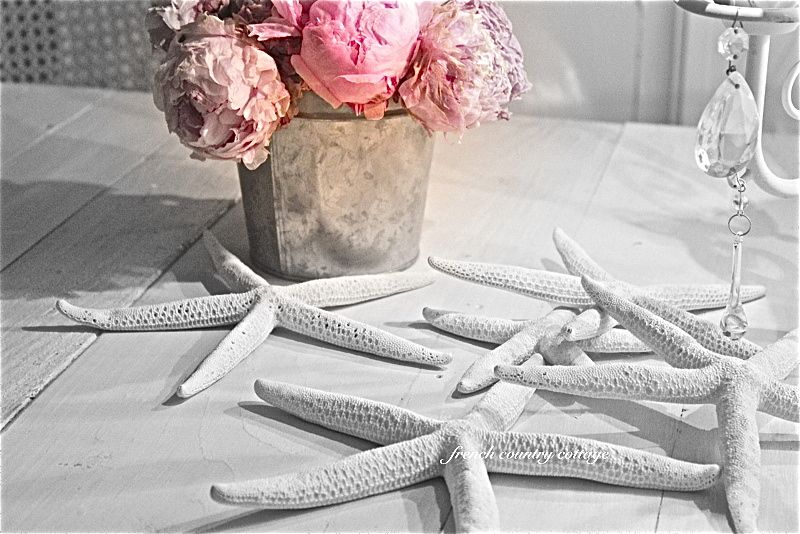
I have had several questions asking for a tutorial on how we made
the wood plank tabletop for my vintage table that I shared
the other day.
If you missed it- the post is HERE
the other day.
If you missed it- the post is HERE
This table had glass on it originally that ended up being broken…
a casualty of the snow and pergola incident…
a casualty of the snow and pergola incident…
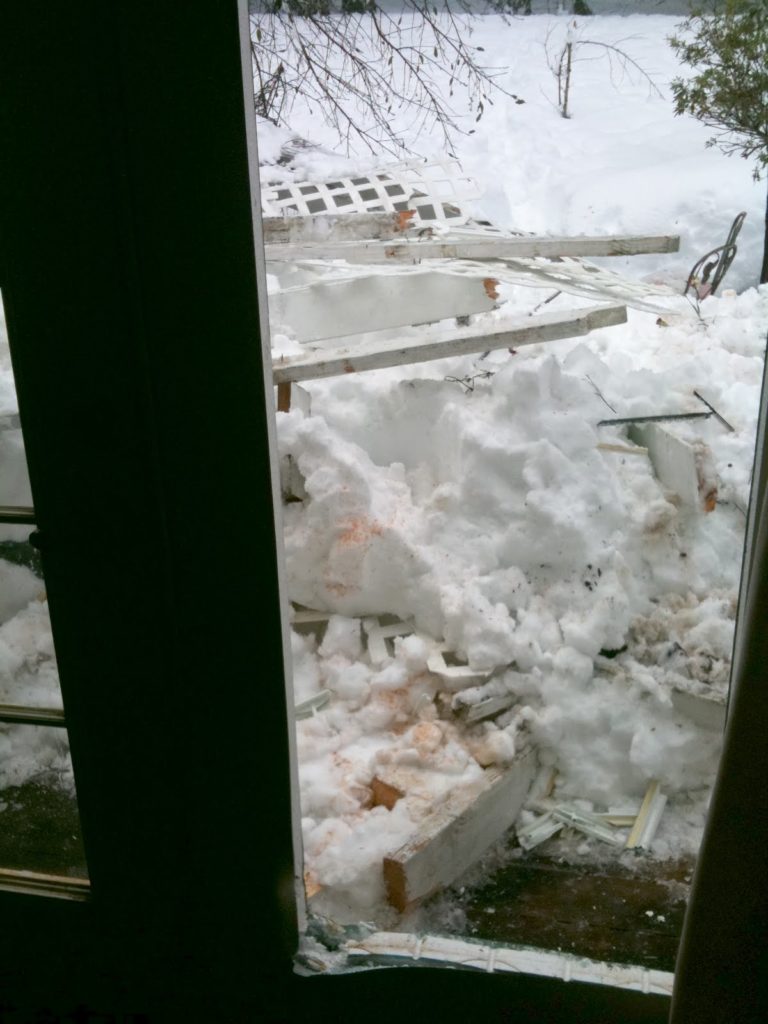
I wasn’t sure just how I was going to fix it-
get new glass for it or come up with something else.
Well, we went with something else.
This was such an easy project and took maybe an hour start to finish.
The paint drying was probably what took the longest!
Here’s how we did it:
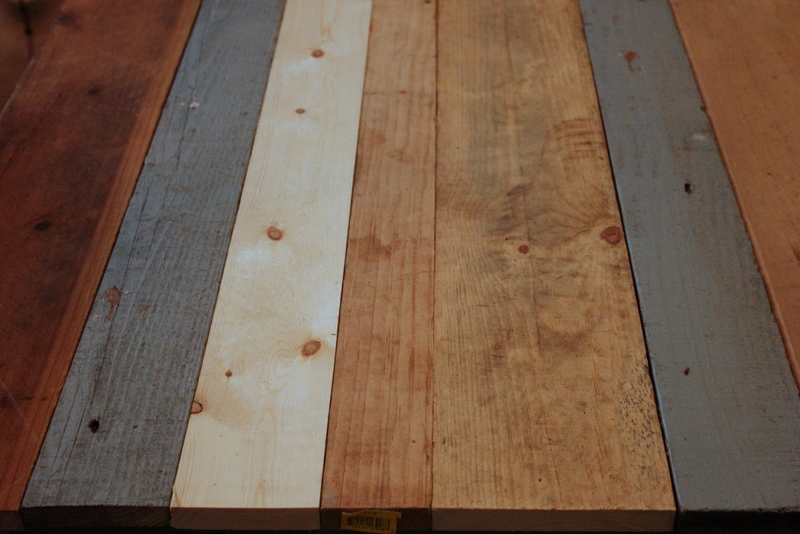
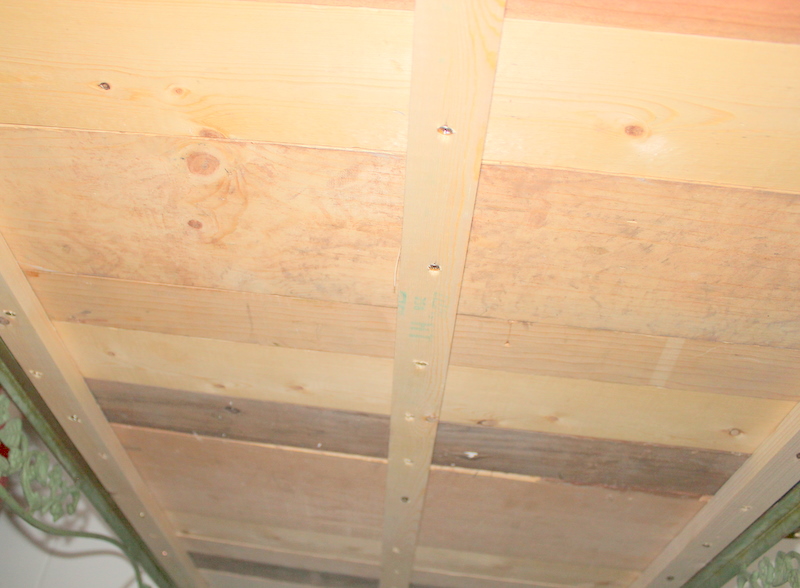
We always seem to have random wood leftover from projects so instead
of running to the hardware store and grabbing wood for a top
I thought it might be fun to make a tabletop out of random widths of wood
for a bit of a rustic charm.
We gathered a bunch of different pieces that were old project leftovers, or extras, etc.
Rough sawn exterior trim,
furring strips, several different widths of 1x pine
and even a piece of old grooved knotty pine that was
on one of the walls in our house.
We choose pieces for various reasons
and their texture or the character
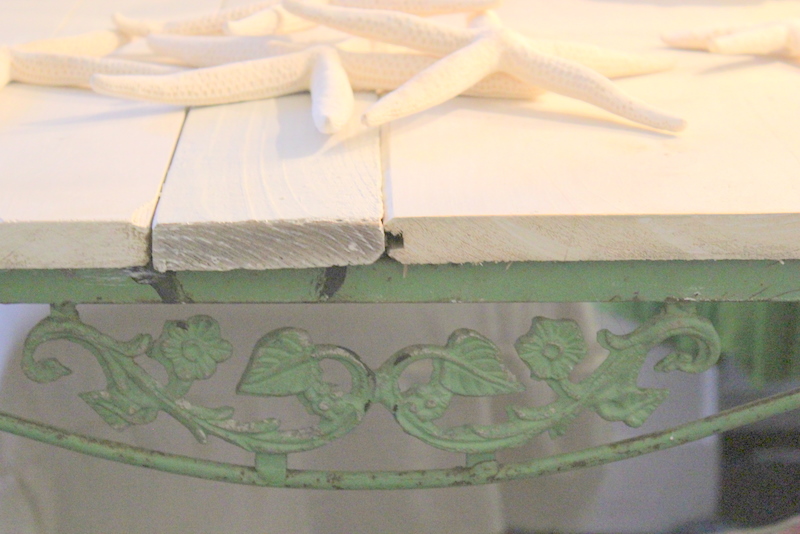
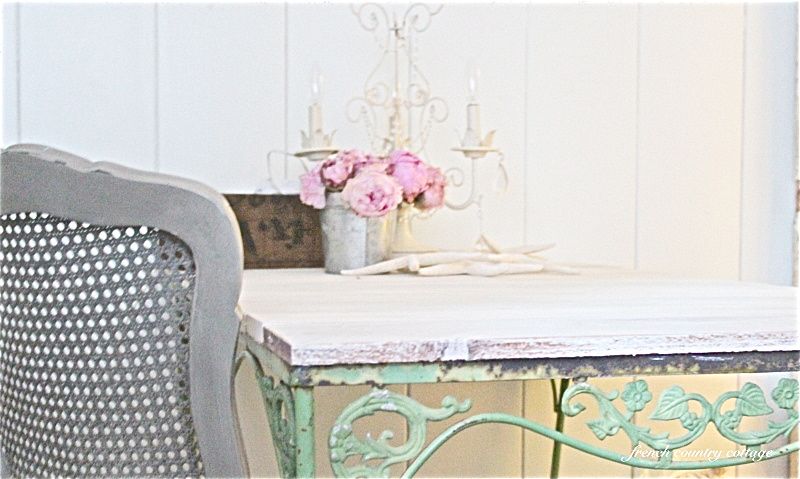
I wanted the boards to run the width- not the length and so we
cut all the boards to the width of the table-
This table is 31″ wide (we added a little for overhang on each side.)
Stacking one next to the other
the boards were adjusted and tinkered with until the randomness made sense.
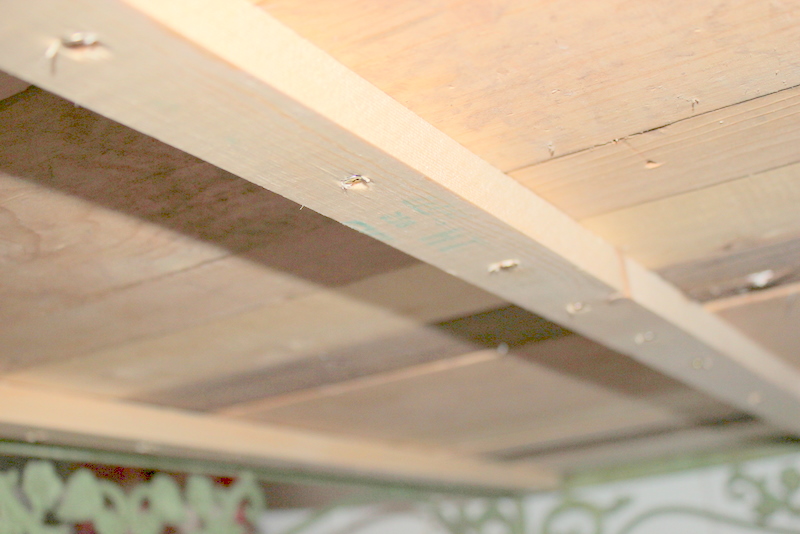
Taking 3 ~ 1×2’s cut to the length of the table-
each tabletop board was secured to the 1×2 to hold it in place
(from underneath or from up top and then you can flip your tabletop
so that the strips are underneath)
*Make sure the screws are not too long- you don’t want them to pop up through the top.*
Once the tabletop was built and secured-
it was time for a little paint!

I chose my good old basic white semi-gloss paint and
watered a bit of it down so that it was more of a thick whitewash.
I gave the top 2 light coats with the white and then did a dry brushing with
a little french linen chalk paint.

Since I was looking for an aged look to the boards
the next step was sanding.
Using a coarse grit sandpaper-
I sanded the edges of each of the boards to round them
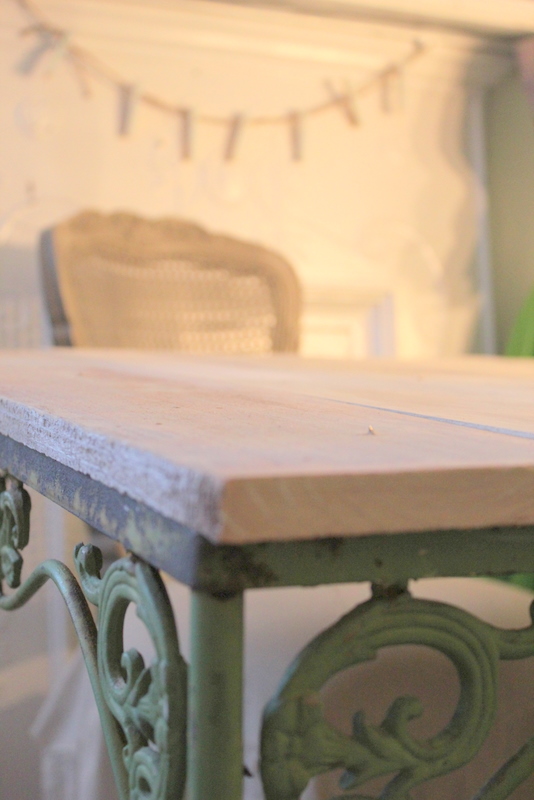
and then sanded the tops to take off some of the paint.
I concentrated on sanding more heavily on the knot holes or grooves in the boards
and in between them the most.
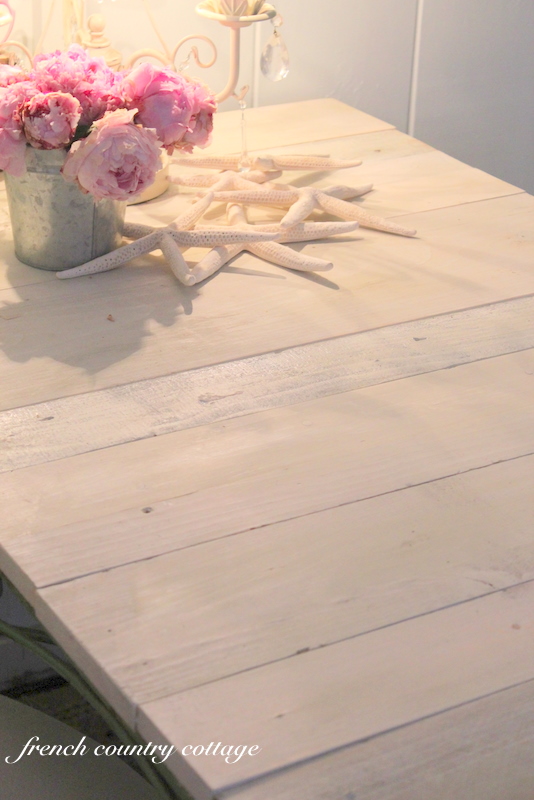
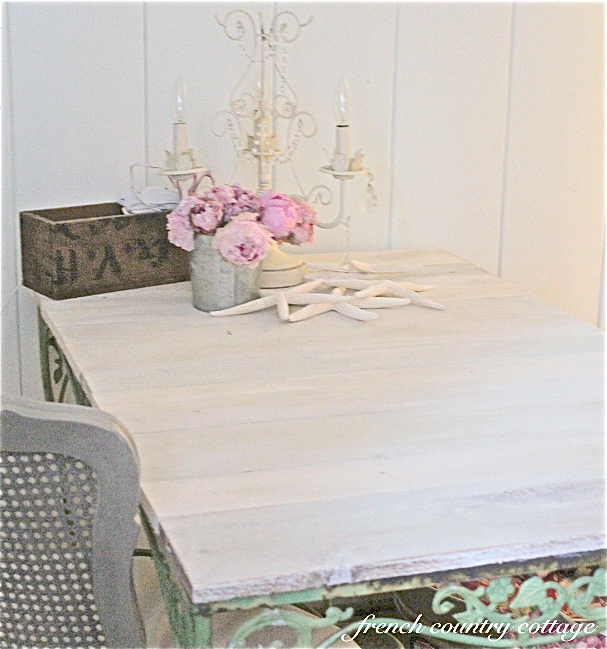
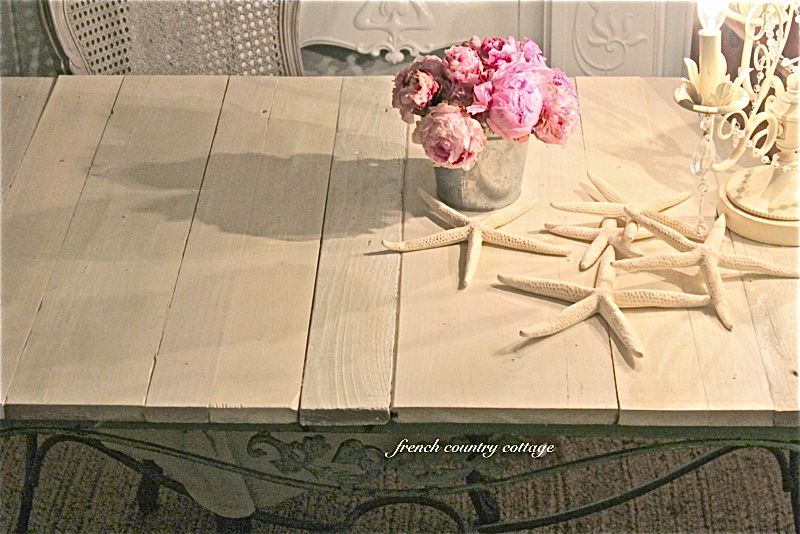
So that’s about it!!
Super easy and quick- that’s my kind of afternoon project!!
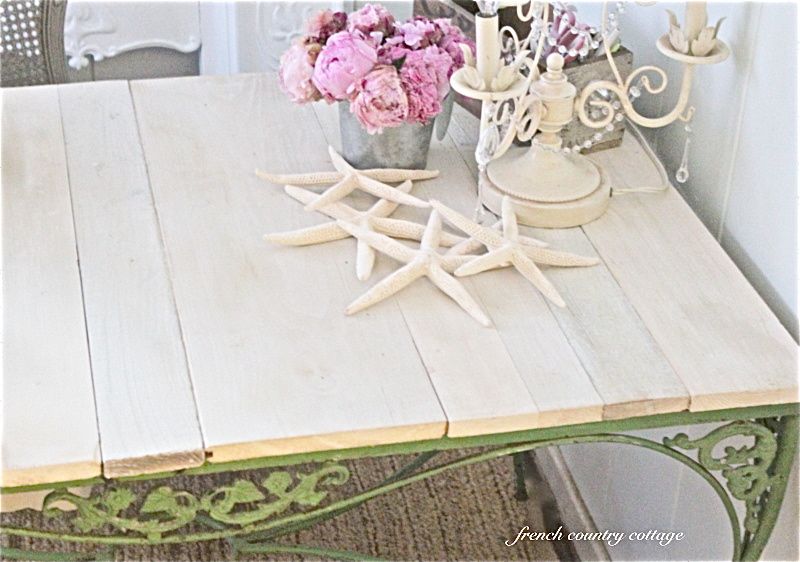
I love the random edges showing
&
how each board is different in texture, finish, and distressing…
how each board is different in texture, finish, and distressing…
but all together
they create a beautiful rustic tabletop for an old vintage table.
they create a beautiful rustic tabletop for an old vintage table.
Sharing at
Romantic Homes
Romantic Homes
See you this afternoon for Feathered Nest Friday!!
Hello there,
that looks really beautifull shabby!
Have a nice day!
Greetz, Sylvia
I love it also! Great job.
OMG. My son just sold a glass-topped table like that on Craig's List. Darn. I could have replaced the glass with your technique and had a great table.
Thanks for posting this tutorial, Courtney. Your table is so pretty, and I think you will enjoy it so much more without the glass top.
Hi Courtney…it's just lovely as is everything you do…thx for this inspiration…I have an old metal coffee table that was my mom's…I was going to have a piece of glass cut for the top, but I'm really liking the look of this even better….xo, Mariaelena
Oh my goodness…I need to write this on my calendar…the first comment on YOUR blog! Your's is the first one I read every day for the most beautiful inspiration….gets me started on a happy note all the time!
Love the table…..
Lorraine
I am in LOVE w/ your table….both the planked top and the base!! Beautiful!
Thats a wonderful idea.
I love it.
Have a nice day.
Love Annette
Thanks for the tutorial … the table looks so nice with the random top and that sweet iron base. And I agree, those quickie projects are so much nicer than the stressful ones that take up a better part of your day. Have a good one!
Wow! I mean wow!
Oh my, I guess having the table top break was a happy sort of accident, beacause this looks beautiful, Courtney!
xoxo
Oh I am in L.O.V.E. with this. Thanks for sharing – this would make the best backdrop for all my cooking projects.
thank you for the tutorial. you can bet I want to do this instead of paying another $300 for glass
So pretty! The pink and white is so beautiful!
Sherry's Bees Nest
Barnwood and clapboard beware…thanks for giving me an idea for salvaging some wood!!! Now I can't wait for the demo to start!
Courtney,
your table is beautiful!! Thanks so much for the great tutorial! Have a great day!
Xo,
Shellagh
LOVE it Courtney! xo
He descubierto tu blog y me ha encantado. Desde hoy te sigo si lo deseas te invito a conocer mi blog y si es de tu agrado, me gustaría tenerte como seguidora en mi blog y así poder seguir en contacto. Un saludo muy cordial.
Manoli.
You are so very clever. Richard from My Old Historic House.
Love it!
Thanks for sharing your tutorial! I would like to try something like that myself one of these days!
Thanks for sharing the -how-to- Courtney. I loved this little the first time you revealed! andrea@townandprairie
It's so beautiful that it's hard to believe it was that easy. Great job!
We extended a French country table – like yours, and we were pleased with the result. Recycle, enhance, be creative! It adds so much character. Love the peonies!!
I love that project. Perfect for a table without a glass top. I'm pinning it.
Love it! The different shades of wood on top of that ornate base … perfection!
The flowers make it complete! It's such a good feeling to be able to use what you have on hand!!! Looks like a grand farm table I need for the porch. 😉
Great idea… my daughter just replaced the glass for her similar table. Too bad we didn't come up with this great idea first. Cuter and a cost saver too.
Blessings,
Spencer
Thank you ever so much for sharing it looks amazing and a great job. What a beautiful space you have created here I will follow on my way out so I know my path back here. Perhaps you will find the time to come visit me soon and do the same. I look forward to engaging more throughout the year and beyond. Take care. Cheers SpecialK XoXo
Love the table. Thank you for the tutorial.
Fabulous! So much better than glass would have been.
it's so awesome, courtney.
michele
Love your blog! Im so happy I got a chance to look! Im now a follower!
Mark @ room363
Love the table!
This is a beautiful table!
I'm going to show my husband this post!
This turned out so beautifully! I love the wood mixed with the metal legs. Great job.
What a stunning table!! Happy Friday, my friend!
Beautiful!! I love your taste. Thanks for your sweet comment on my blog-XO, Steph.
SO GORGEOUS!! I LOVE PEONIES, THE PINK ONES THE MOST. I THINK THEY ARE MY FAVORITE FLOWER! I CANT WAIT FOR THEM TO START BLOOMING HERE IN OREGON. VERY PRETTY POST.
So pretty! Love the different wood textures too.
This would look perfect at the end of my kitchen! LOVE LOVE LOVE
Love this ideas. Thanks for sharing!
OMG……. Courtney the same thing happened to me this past winter my gazebo caved in….and the glass table top was the casualty. I was going to run out and buy a new table, but I just love this IDEA of yours , seems so obvious now that I've seen your post. I'm going to put the hubby straight to work thanks xo [email protected]. com