A post all about Q&A and how to refinish a vintage table.
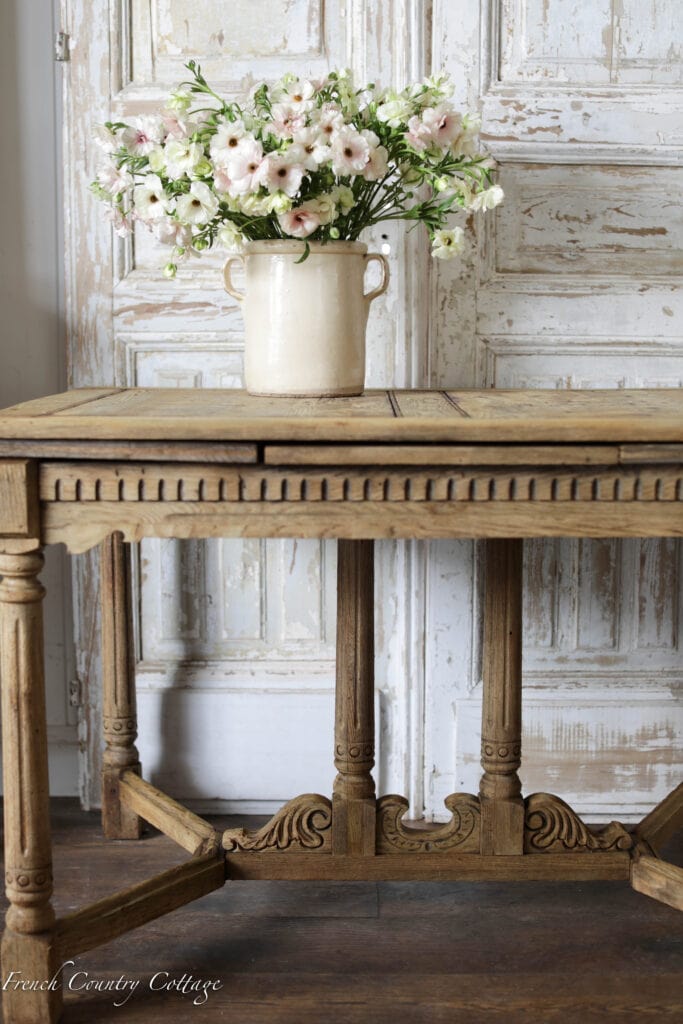
Remember this sweet little table I picked up?
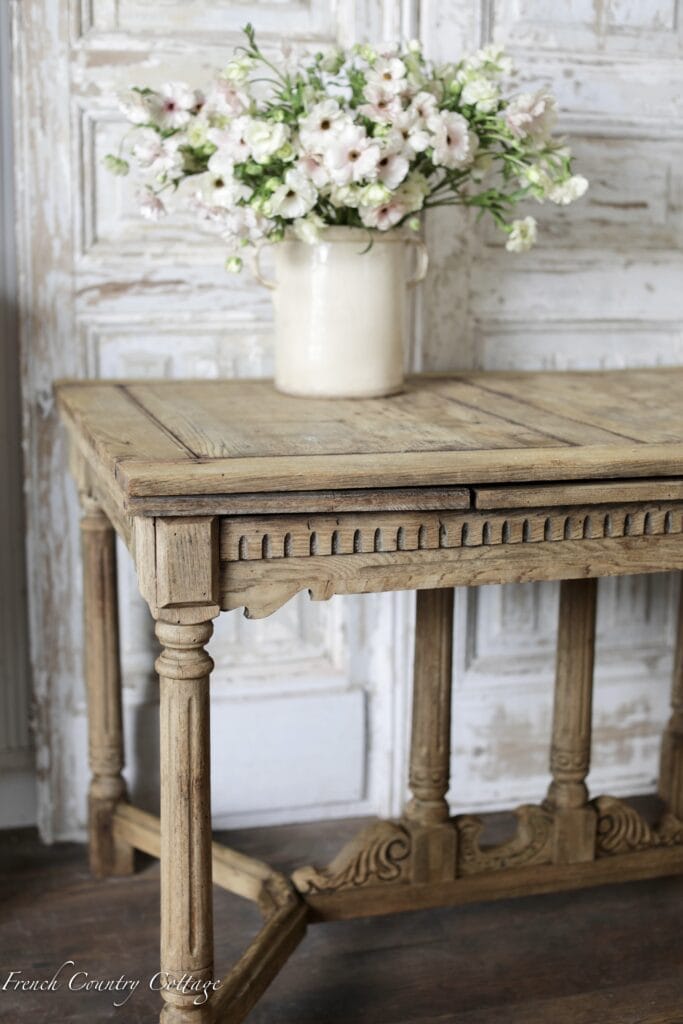
It needed a bit of love, praise and sweet talking to make it feel pretty again. And I suppose you could say- a little bit of vision too. It wasn’t necessarily in terrible shape all things considered- but it was definitely worse for the wear- so much so that it was listed for Free pickup. You can read more about it BEFORE and also the first look at the AFTER here.
I have always been a sucker for a diamond in the rough. Things that are forgotten for a bit that need a little polish and work to shine again? I love them. So this table spoke to me right away. I loved the oak, loved the carvings and the details- and that it had leaves to expand. Of course, I loved the price as well haha. It was a process to get it looking like this and when I shared- I got a lot of questions about what to look for when finding a piece to refinish, the process of refinishing it and my experience with using that somewhat controversial new to me method of stripping a finish. So today- that is what this post is about. In full disclosure- I am NOT a professional. I don’t know all the things about restoring or refinishing furniture or anything else. I do my research and try things DIY- and share my experience but in no way am I telling or showing how to go about it yourself. Always follow manufactures guidelines and ask a pro for advice and help if you need it.
A Diamond in the Rough
First things first- finding that diamond in the rough to makeover. You asked what I look for- here are a few tips for what I look for and the method to my madness:
- Search Craigslist, Marketplace, local ads online for vintage or antique furniture. You can add your own extras to the search there: Table, Armoire, Carved, French, etc.
- Scour local thrift shops and yard sales for prospects– a somewhat easier way to find pieces by bumping into them and seeing what inspires you- and looking them over before committing.
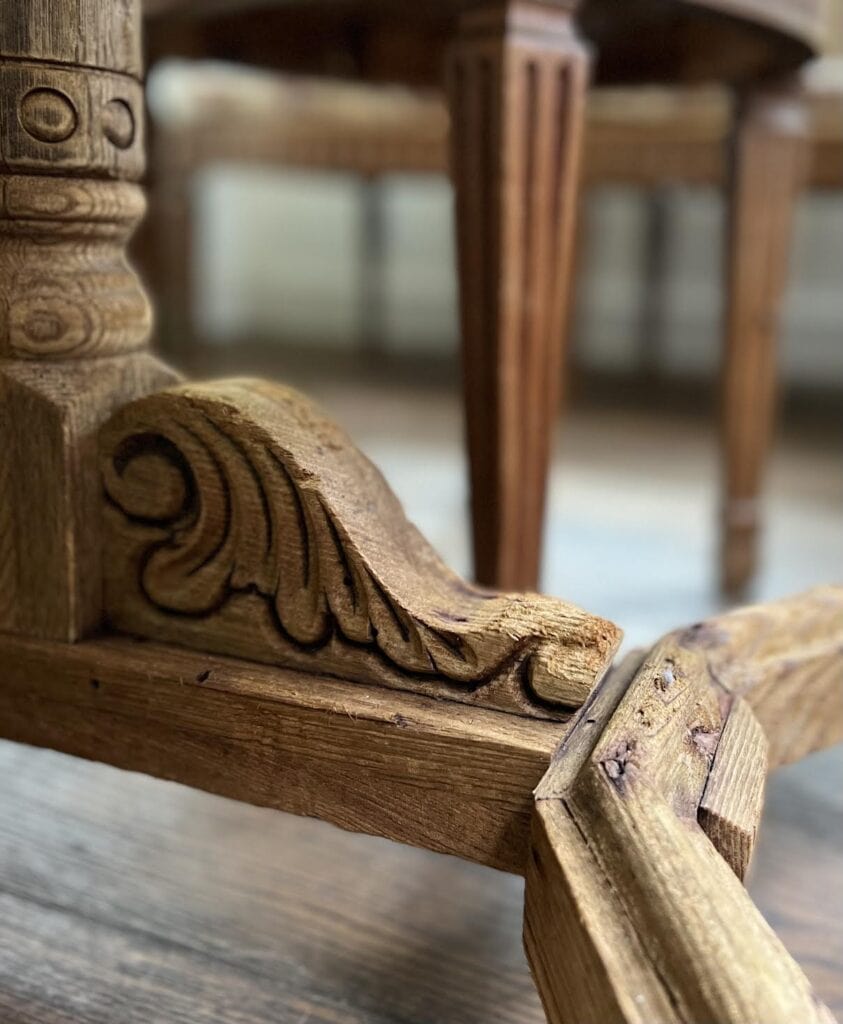
- Look for pieces that are solid wood and that have details like carvings on the apron, fluted legs, etc. Those details are going to stand out beautifully when uncovered and they definitely do a lot of talking.
- Pay attention to the construction and condition. Is it sturdy- or can you make it sturdy? Is it well constructed or kind of being held together by a string? I avoid wood veneer when possible- it is just a whole lot more work to make pretty and it doesn’t usually weather that well. For example- that vintage farm table I brought home before for Inspired Gatherings- the reason I was looking for another smaller table is because the veneer was damaged enough that I had to peel it off to use the table and now- the top is not so photogenic any longer.
- Solid wood will give you more options for refinishing- and will also be better for sanding off puppy bites and dings in the wood should you need to.
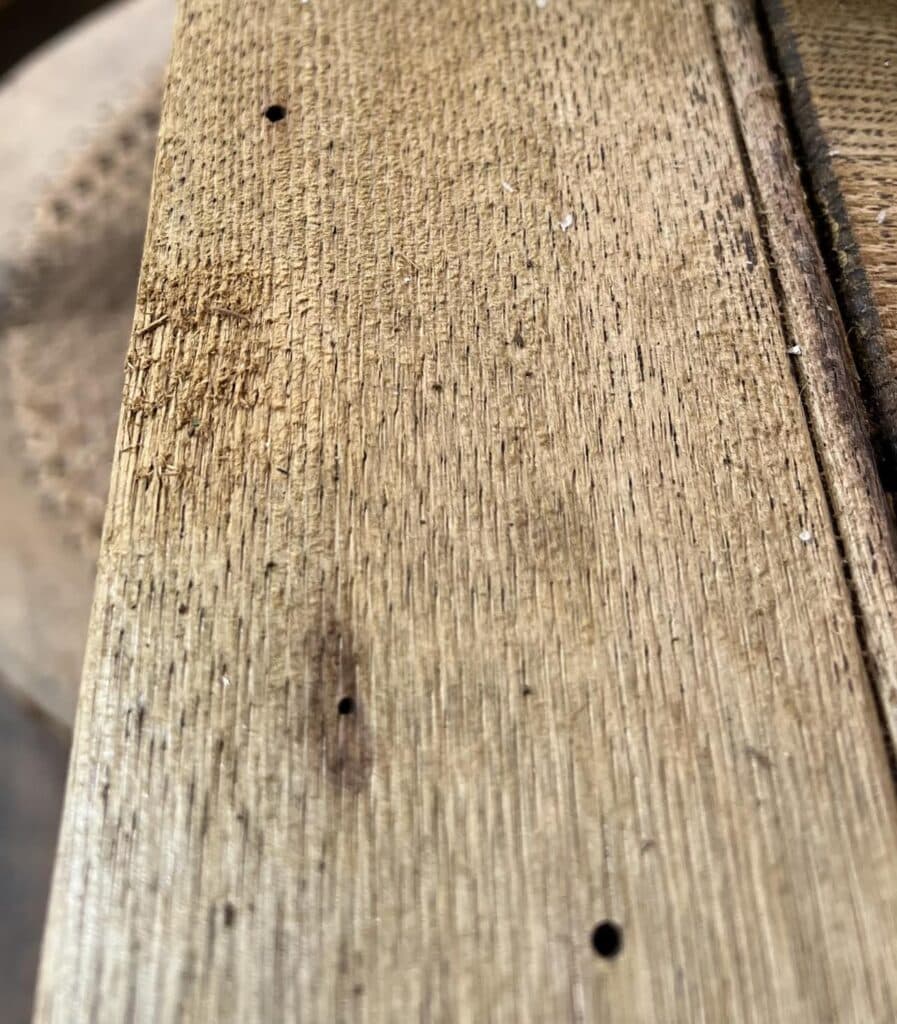
- Beware of bug damage. You know why this one is noted here- just beware of those pesky beetles and wood boring insects. Past damage looks like patina and I admit- I love the look. Active infestations are no bueno and are not easy to get rid of. I would definitely think twice on the piece if it has active beetle activity – even if it is Free. Unless it is triple- love and that I can’t leave it behind feeling– consider pressing pause and think about it.
- Beware of structural damage, strong smells etc. Did you know I avoid most upholstered pieces these days because of the smells (usually smoke, molds) and literal yuck factor that goes into reupholstering? I do. I haven’t always. But I do think twice, 3x and even more now when I find an upholstered piece I love. And structural damage? I mean, if it is a ridiculously fabulous antique cupboard from the 1800’s and it needs a bracket to shore it up- okay no problem. But if a leg is completely broken off, missing key structural pieces and it needs a new one -or otherwise needs some new fangled look that involves removing the other legs to make it work? It could still work for you with some vision- just give it some thought.
- If it Talks loudly to you- listen. Okay- allllll those tips up there aside- let’s be honest- if something talks and talks and talks to you- listen to it. It might be THE ONE and the piece of your dreams with a little work or clean up. And if it is free except for your time and energy- you aren’t sinking a ton into something you aren’t sure will turn out. So I say I would go for it.
Q&A
The basics aside- onto your most asked Q&A all about the process and how it all worked out.
Q: How did you tighten up the joints? I mostly used screws, glue & a nail gun. The table leaves already had holes and areas where the screws had simply fallen out and were left behind somewhere- I just added some back and they were good to go. The joints you can use a tiny bit of wood glue and if you need them to stay extra strong- you could tack with a nail gun- the nails in a finish nail gun are tiny and not noticeable when in wood but they do make a difference.
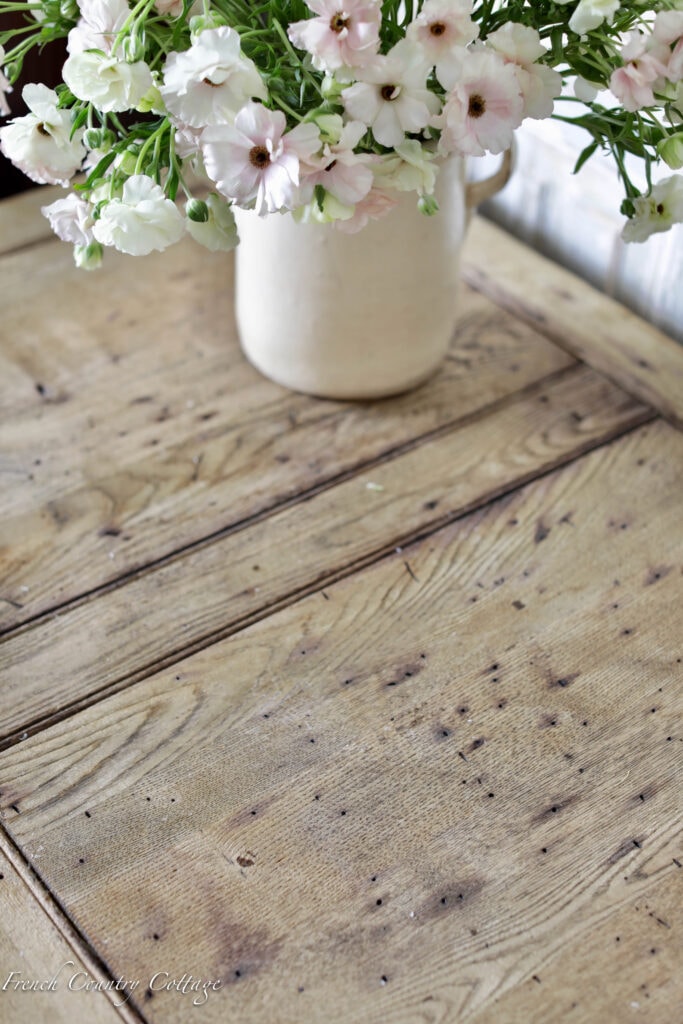
Q: Did you use Bleach on the wood? I did not use bleach but I have heard a lot of good result things about it to ‘bleach’ the wood and get the look. Currently the table is a raw finish – and in person is a very nice light bleached oak look- but if it darkens as it sits, I may try to bleach a bit.
Q: Did you seal the wood? No, I haven’t sealed it. I love the rough raw patina it has currently- so am not sure I will seal it. I had tested some matte clear sealer on one of the other pieces – and was not happy with the ‘sheen’ and how it darkened the wood. So, will wait on it for now.

Q: Oven Cleaner strips wood? Honestly- news to me too. I had never used it before and never heard of it until recently. I was kind of talked into it after a friend of mine used it with great success and ease – but to be honest- I don’t even use oven cleaner to clean the oven so. Is it better or safer? I am not weighing in on that one- I don’t know enough about it or about using strippers in general to have a fact based opinion. Even traditional ‘safer’ citrus based strippers have landed on my skin and burned and the smell was not any better so really not sure which of the two are less toxic. The process was similar for both -we had to rinse both off with water. But we also had to wipe with ammonia to get all the citrus based stripper off- and using ammonia is a negative for me. I would rather not ever use ammonia again after using it one time. It was bad even with a mask, goggles and gloves. So needing that to lighten the wood further after a traditional stripper is something to consider. The oven cleaner seemed to bleach the wood as it sat-which is what I had heard would happen. So no ammonia or bleach required. As far as concerns with pets – I would not use anything where any of our animals are or where they roam and forage and live- doesn’t matter if it is oven cleaner, stripper, oil based stains, etc. even something considered ‘safe’. We have several acres of land and have dedicated areas where we work on ‘house’ projects and have used things there as needed while working on our house over the years.
Q: How did the oven cleaner do compared to a stripper? It really did work amazingly well and it is a tad hard to admit that. After spending hours and hours using stripper, rinsing with ammonia, stripping and scraping again and even using tools to clean out the carvings- well, the oven cleaner went on and bubbled up a whole lot of gunk the first time. I didn’t have to pick out the details- just scrubbing with the brush worked to get them clean. That said: each piece is different. This table had very damaged finish already- so it was not a huge job to get the rest of the finish off. So all in all- I would say that it was easier in many ways than the traditional stripper. BUT- I do know that there are hesitations with using oven cleaner – and rightfully so. After researching, I didn’t really find much difference in the precautions to take and concerns between using a traditional ‘more safe’ citrus stripper or cleaner. Both have risks, Both require precautions. And part of me questions why someone would ever spray oven cleaner inside their house AND in an area where you are placing food. So to be honest- me and my natural cleaner stocked cupboard do get it. And that is one reason why I have never used oven cleaner before. So, do your research on it, take all precautions as suggested by the manufacturer and decide what works for you. In disclosure- I am not a pro or an expert and not offering any kind of advice or guidance.
Q: What tools do you need? Alllll the protective gear- goggles, mask, gloves, long sleeves, etc. of course. Anytime you are using chemicals like a wood stripper (or oven cleaner) you need to protect yourself. A tarp, a good scrub brush to scrub the loose finish off, a few shop towels to wipe and dry and if using water to clean off the piece- a bowl with some water and a few drops of dish detergent- which you will need to change often. You can also use a hose with a high powered sprayer attachment to clean extra well- that is up to you and if you have an area that you feel comfortable sending water.
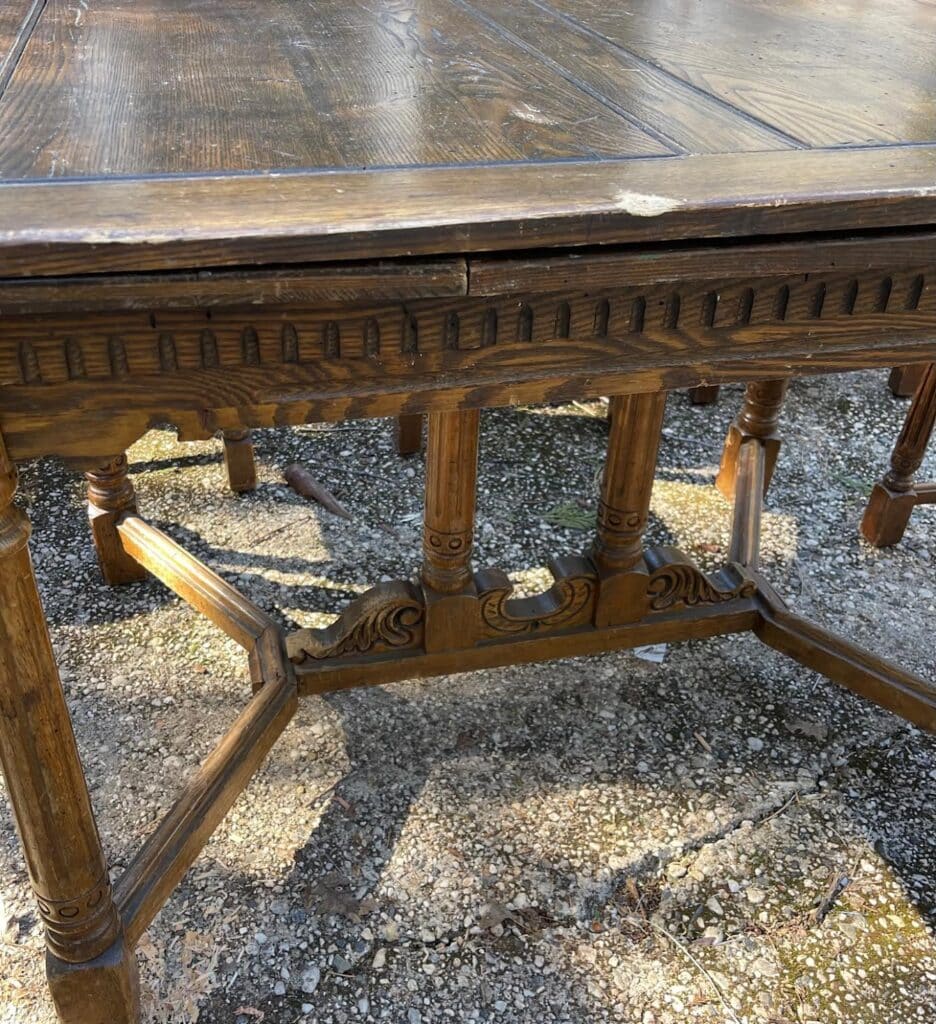
Q: How did you fix the puppy love bites? I didn’t- they are there at the moment. (before of the scuffs on the table top and you can see the chew marks on the carved stretcher underneath)
A little bit of sandpaper and elbow grease would do wonders. I originally intended to do that- but for now, they are as found as are the scuff marks on the table top. That spot where it is roughed up is where that scuff was on the table before. It blends well with the rest of the finish now but will be sanded & smoothed a bit.
Q: How old do you think this table is? From the research and what I was able to find that was similar- probably 1930’s.
Q: What type of wood? I believe this is oak.
Q: How many times to strip a finish? I will be honest, I have only ever used citrus based strippers -which a lot of people say don’t work, and now the cleaner. But I have never had a piece completely clean up with one round of stripper so be prepared for a second round- possibly more if you are looking at stubborn finishes.
Q: How did you get the finish out of the carvings? For carved, fluted, etc. areas- use a tool to scrape them out (like a pick) and also scrub really well to help loosen stubborn bits of finish. For stubborn areas- you might need some extra scrubbing power to help- I would suggest these attachments that I use to scrub the grout and tile in the bathroom. Each one attaches to a drill for high powered way better scrubbing action than my shoulders and arms could ever do. It is AMAZING. (click to shop)

Q: Tell me about ‘white wax’. My friend Lisa at Jolie Paints sells a ‘white wax’. I text her while redoing those other pieces and asked what she would recommend for keeping that raw finish look while protecting the wood. She advised to stay away from a traditional wax- it will darken the wood. And after all that hard work to get a lighter raw finish- you definitely don’t want to darken it. So she suggested a white wax- which will give it a bit of a ‘pickled’ appearance depending on how heavy you apply- but also just tones down the raw finish a bit and leaves it with a lighter finish than traditional wax. (click to shop)

Any other questions?
Phew. I think I covered the questions you had- but if I missed any- please let me know in the comments or drop me an email. And if you are tackling a fancy schmancy furniture re-do- I would love to know what you are doing and how it goes! You can join our French Country Cottage decorating community on Facebook and share your photos with the group easily.
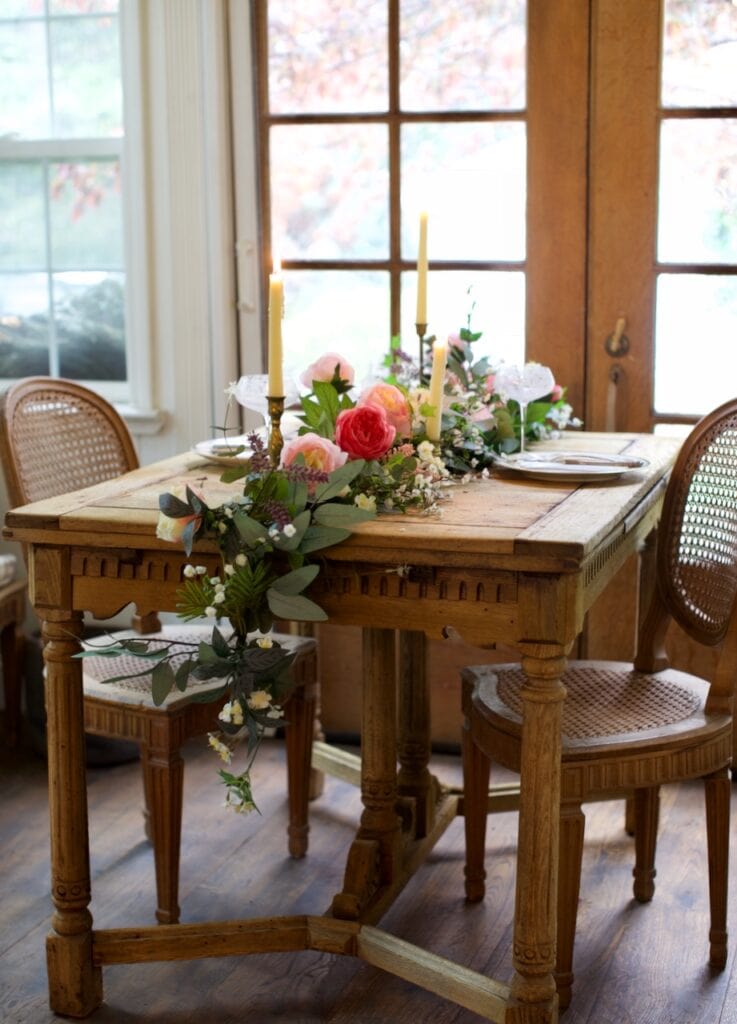
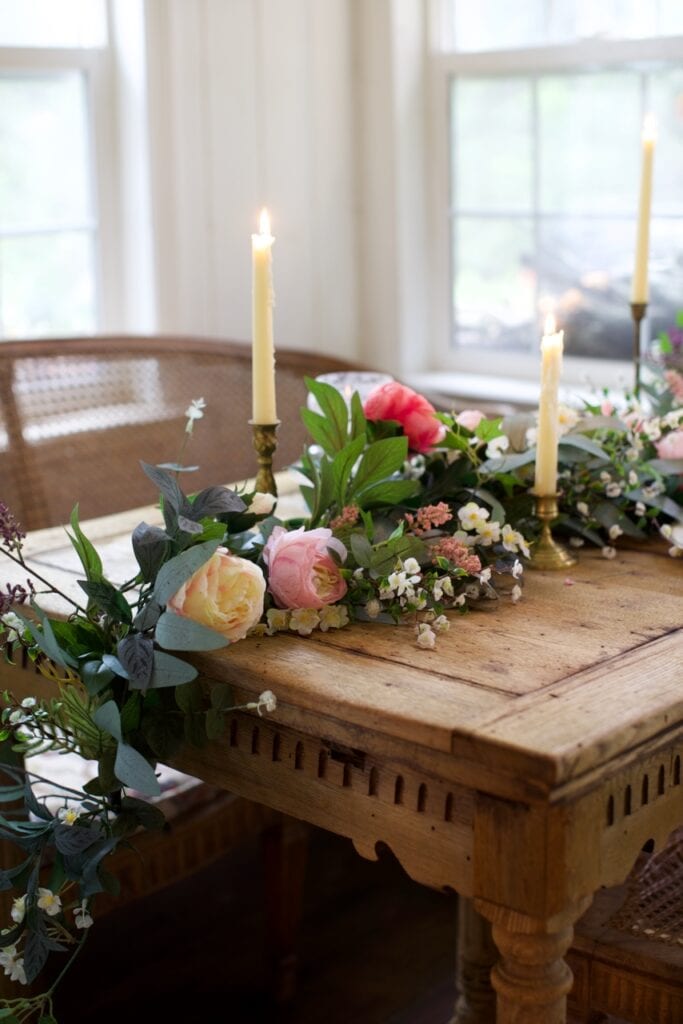
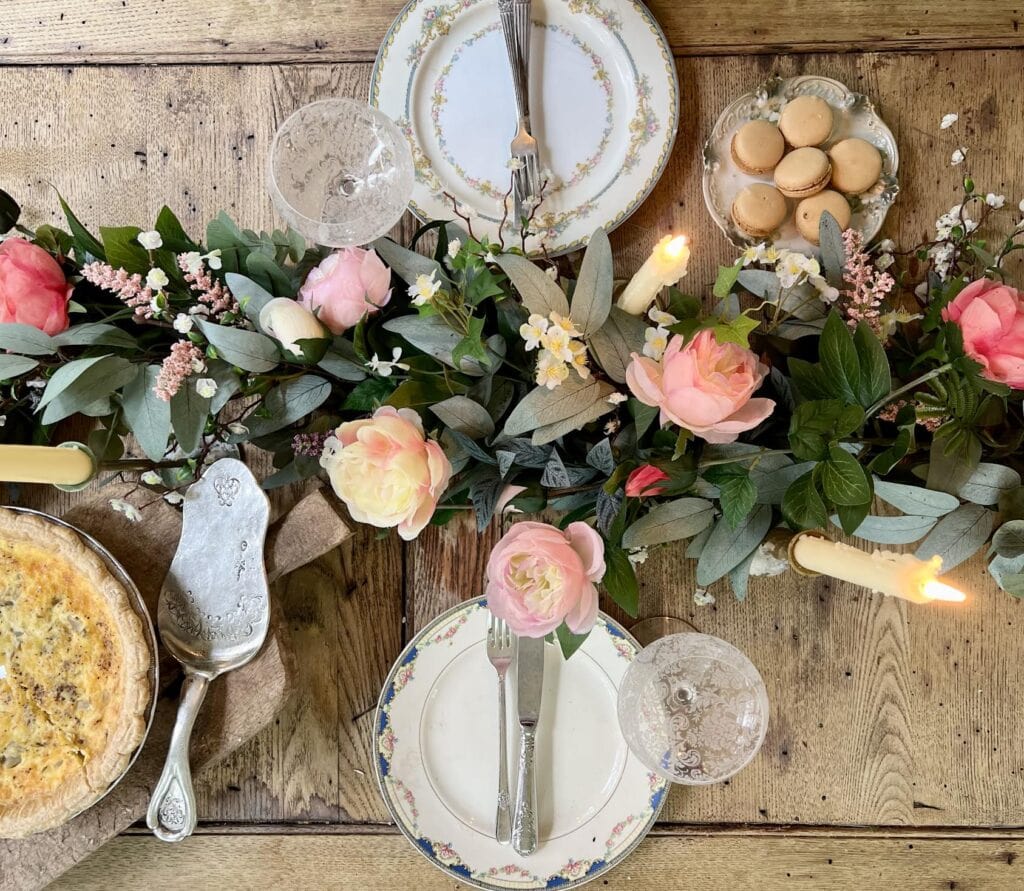
Side note- the garland photos are outtakes of a recent shoot that you will be seeing more of soon. Happy Wednesday all!
*affiliate links
Love it!
Lovely and very informative. You have quite the eye for treasures and the ability to make them shine.
This is so lovely and you sure are an inspiration. This was a lot of work. Thank you for sharing all your knowledge so generously.
Whoa…not certain I should “tackle my table” or… Found an ornate “communion table” in a storeroom of an ancient church in DC…next to Georgetown Univ. The church was “giving away” old pews (which, let me tell you…UNBEIVABLY “heavy!!!) & I spotted this table… The top was terrible…so we covered w/a sheet of copper. Now…I’m wondering”…strip…hmmm…franki ps. We did give a healthy donation
I’m not sure what it is underneath but if it is solid- it might clean up okay. But you could enjoy it with the copper?
Courtney, I found a great product called odie’s oil that seals the wood with no sheen at all and does not change the color of the wood. I use it for my scrubbed look pieces.
Thank you so much for your very informative adventure with this table! I have been refinishing furniture for years (not a professional) but I would definitely love to try this. your table looks incredible! Thanks for sharing!
Thank you for the information. Your table is gorgeous. Just wondering about the oven cleaner. Do you think that would leave a residue or absorb into the wood somehow?
Wow! The table turned out great! Thank you for sharing your honest opinions and succes. I too have been on the hunt for a TABLE BUT have shied away because of the effort to get that raw wood look. As always, beautiful!
It turned out just beautiful!!! I love the color and finish. Wouldn’t do another thing to it. It’s perfect! Now I’m looking around my house for something I can try this out on!