The Good, The Bad and the Ugly. This post about these antiques that we are renovating- has it all. The Good? They are GORGEOUS. The Bad? The Beetles. The Ugly? Layers of scrubbing and cleaning- and finding Swiss cheese areas where the beetles enjoyed more than just a few nibbles.
Today it is all about the cleaning and repairing these antique treasures and how they are turning out.
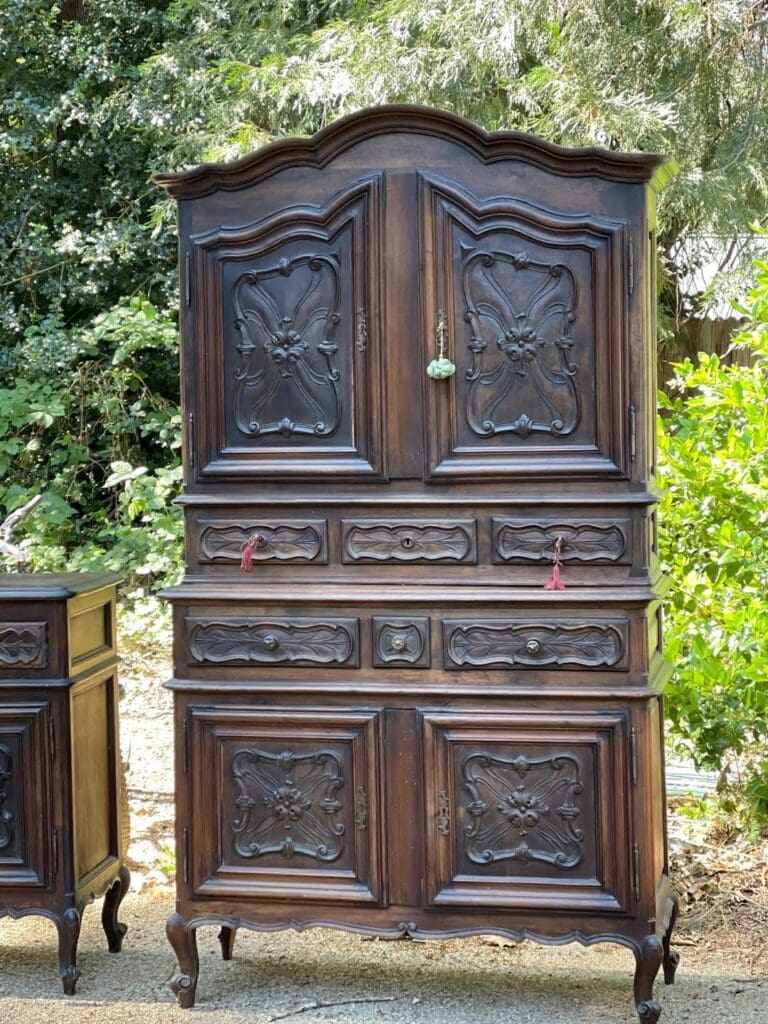
Where we started
I shared these antique pieces we picked up a couple of weeks ago – and the amazing price they were- FREE. But that is with a caveat. They were Free in the sense that they didn’t cost anything- but the amount of work that they took to fix- well…that is a whole other story.
My shoulder, my arms, my back, you name it- ALL yelling at me quite loudly the past couple of days. The lacrosse ball my son gave me to roll on? My bff now. I have had a shoulder issue for probably 10 years now- but when it gets as big a workout as it has the past few days- well- it is just.not.happy. Though, the bonus of all that work and lifting? My arm muscles look pretty good. haha. 🙂 And the pieces? They are looking AMAZING. But we aren’t quite ready for the big reveal just yet- today is all about the process, what we found while we worked and where we are now.
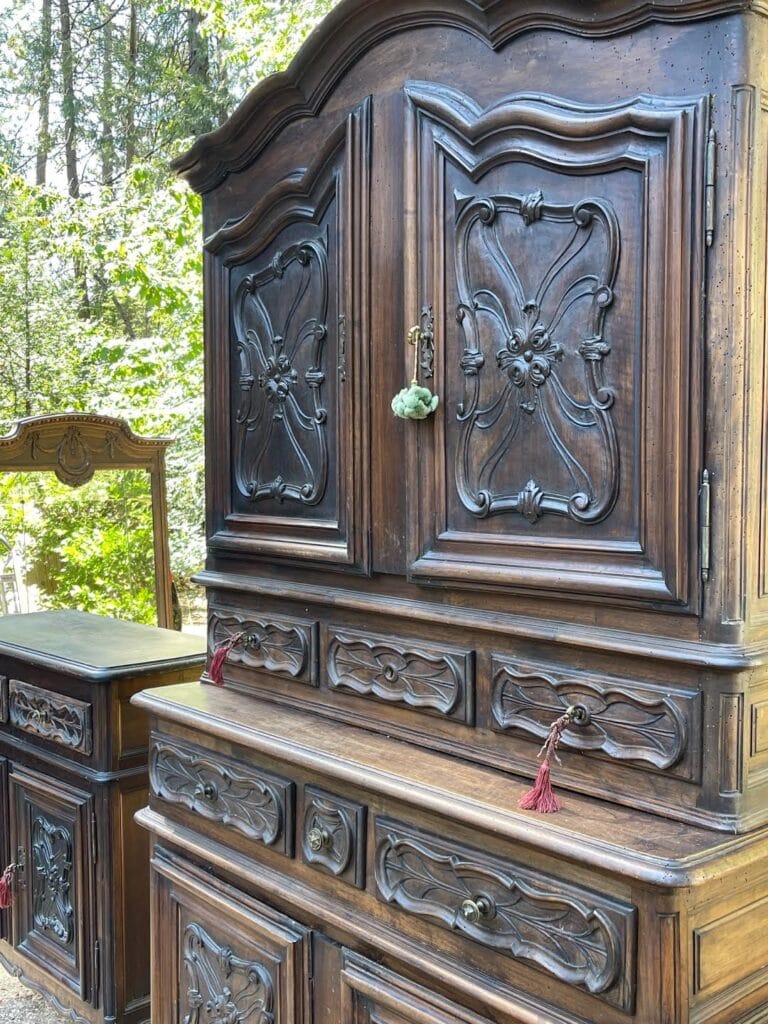
The Old Finish
We let them sit for a week- and watched each day to see if there were any signs of an active beetle infestation. To be honest, there were So many holes- that even just moving the piece slightly caused some dust to pour out somewhere. We did see some sprinkling of ‘dust’ that we wondered if was new or just us shaking the piece while adjusting it- but not really a whole bunch that looked fresh. We decided better to just go ahead and use the beetle spray either way.
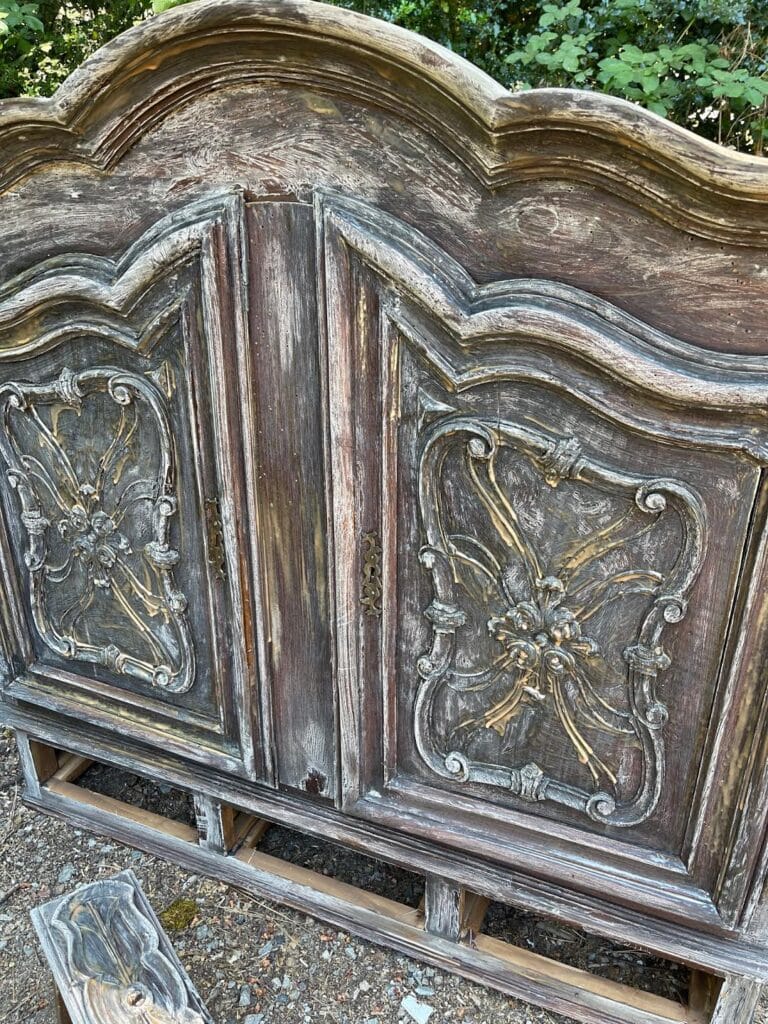
The first step before you use the beetle spray is to remove the finish. I know- so many of you (and me) didn’t mind the dark stain. And know that I don’t alter finishes on antique pieces usually. I love the patina. The age. The charm of that old finish- whatever it looks like. BUT with these pieces – in order to treat them for the beetles that had been making them look like a piece of Swiss cheese- the finish had to come off. And on top of that- these pieces had already been repaired and refinished- likely to treat for the beetles before. So, we were not removing the original. We were removing the redo finish in order to try to save them.
NOTE: SAFETY FIRST: Always use safety protective gear when working with any type of chemicals. Gloves and eye protection- a mask for fumes and particles, etc. – read and follow the guidance suggested with whatever product you are using. It is Important.
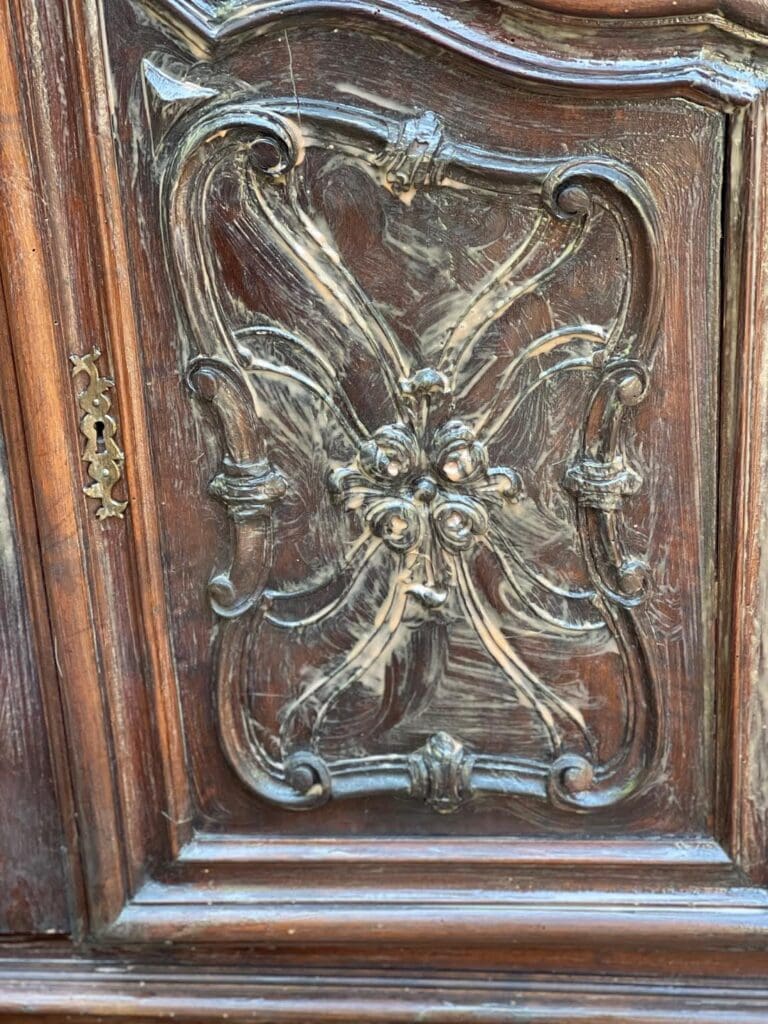
We applied the citristrip and let it do it’s thing. After it sat for half the day, we checked to see how the finish was coming off. And to be honest, as we wiped and scrubbed the finish- it didn’t look like it was doing anything. But – as it dried, we could see the lighter wood underneath coming through.
Second coat
The mirror and one the sideboard required a second coat – and there were a couple areas on the cupboard that did as well. The finish came off unevenly- and on some boards didn’t come off at all. Back to square one- and repeated the steps.
After we scrubbed that second layer off- we used a mix of ammonia and water to wipe the pieces down to remove the chemicals and gunk.

No way around it- stripper is gross. It gets gunky. It is not the easiest to remove when using on carvings because you can’t use a nice flat scraper to just take it off. We had scrub brushes – but even those didn’t do the greatest of jobs. SO, wiping down, using a little pick tool and a whole lot of muscle work was what it took. And that is one of the reasons why my bad shoulder is yelling at me right now.
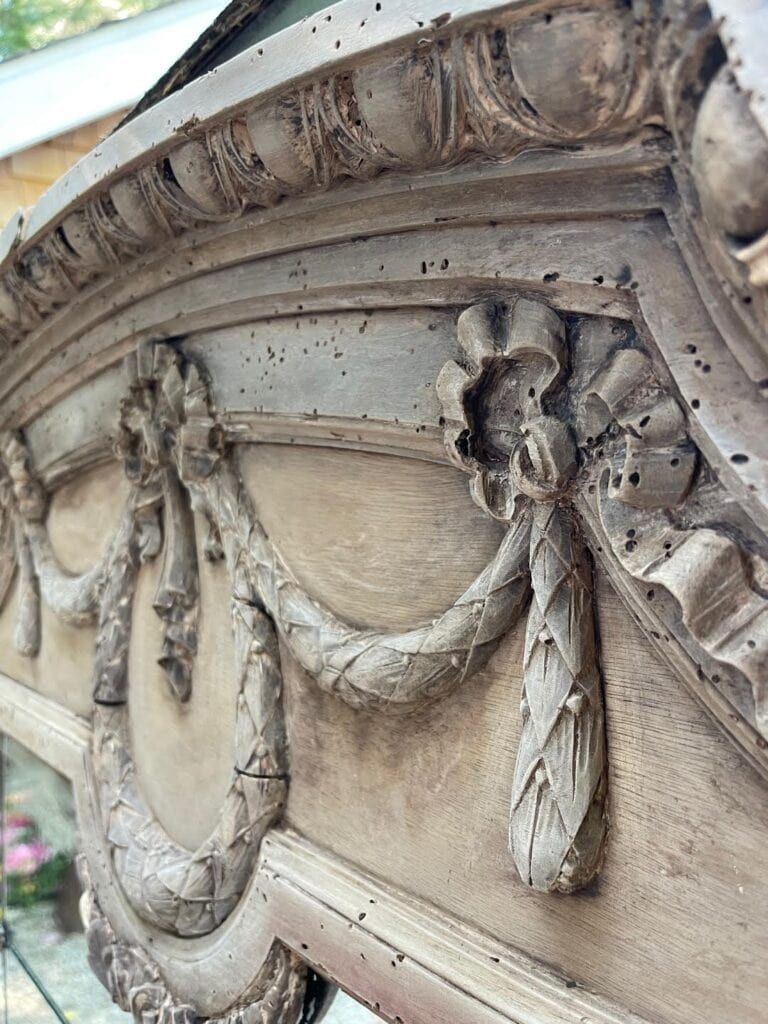
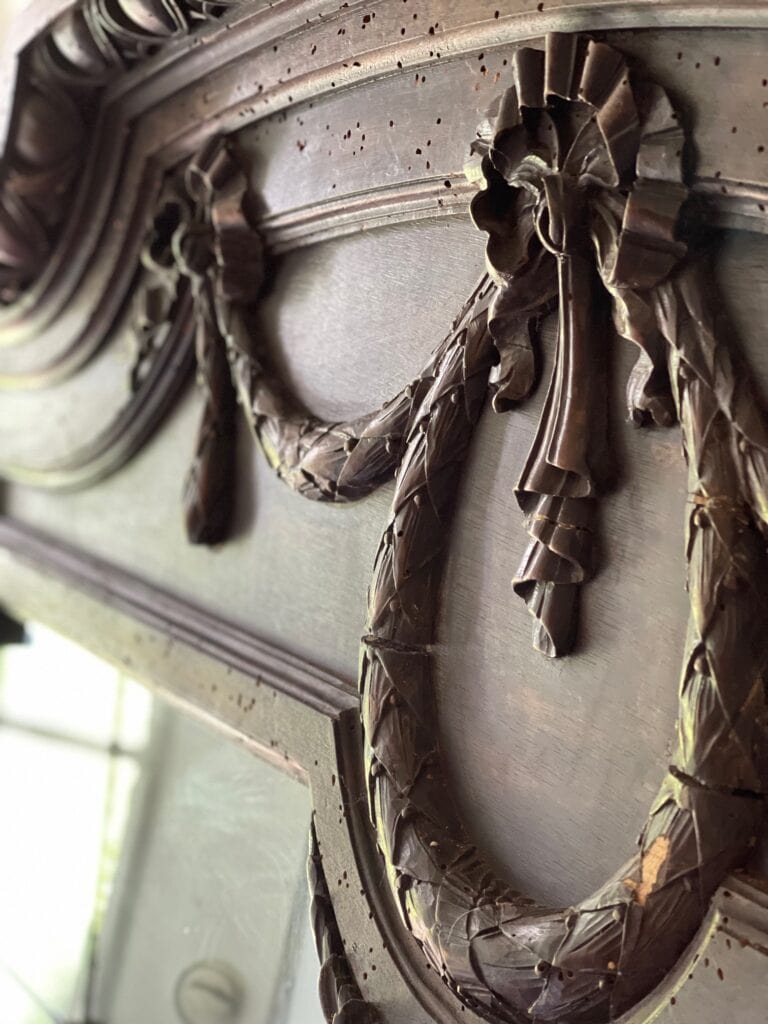
The Beetles
Nope not talking about ‘Can’t Buy Me Love’ Beetles that make you want to dance. We are talking wood eating beetles. They are like termites. They chew and tunnel and eat through all that amazing wood. And they don’t care if they ruin it unfortunately. While working on the cupboard- we found a piece broken by a hinge. When my husband looked closer- a chunk of wood broke off. Though if you found it somewhere else- you would not know it was wood. SPONGE folks. Nothing but sponge. Oy vey.
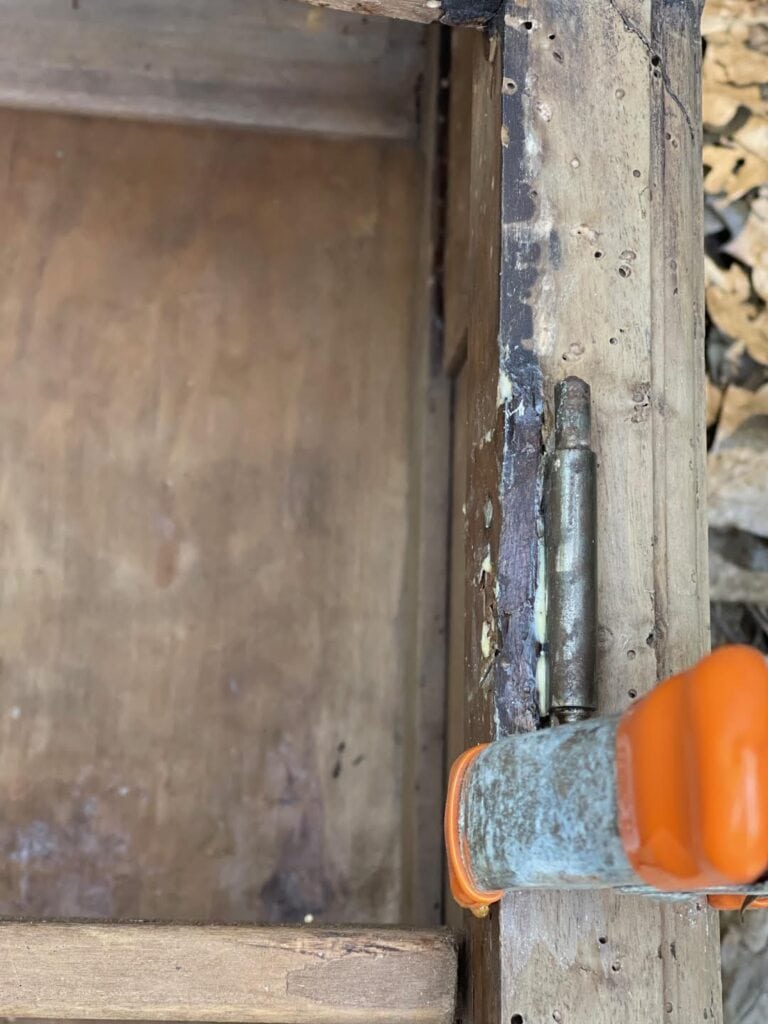
SO, we had to decide if we should repair the whole section or try to fill the sponge. My husband used wood glue and bits to fill the area and try to repair first- if that didn’t work, we would have to use a long bracket or replace the wood. Thankfully, that seemed to do the trick and the hinge is stable. We then painted on a beetle bug chemical – making sure to get it EVERYWHERE. On the back, the drawers, the shelves, the underneath and in all.the.holes. And then – we let it dry. You can then wipe down the wood to clean it again after that step.
Up Next
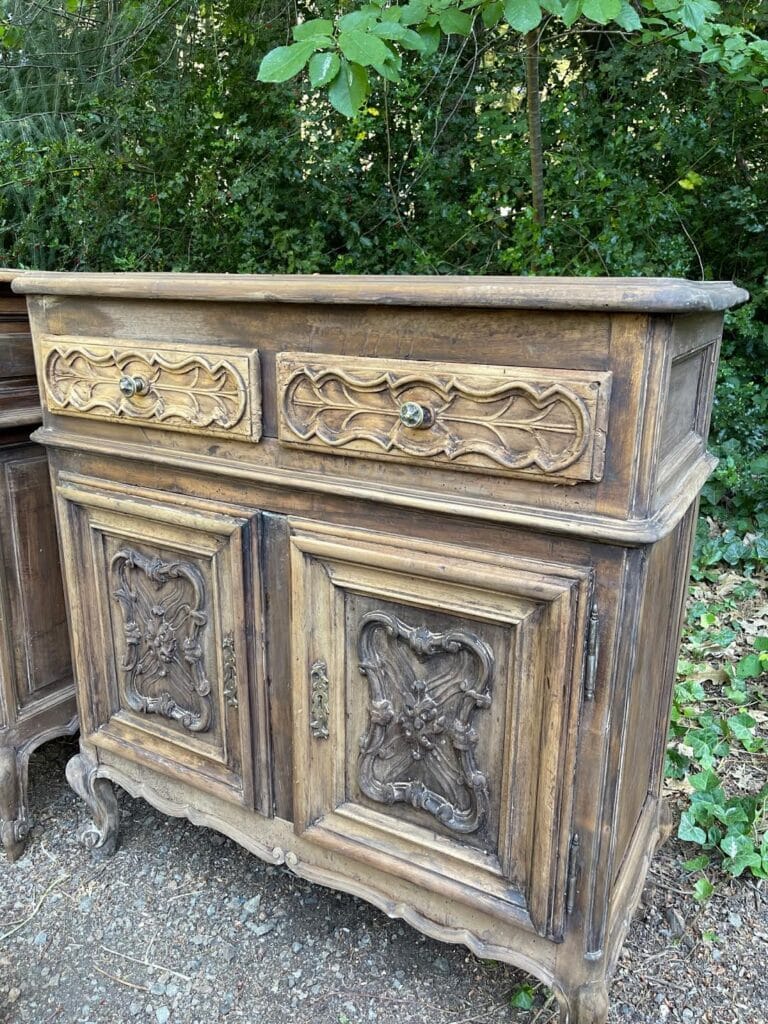
Well, so here we are with these pieces looking a little dry but oh so beautiful. The next step is to find a wax that won’t change the color. Because, after all that work to remove the finish to get to the raw wood- I would like it to stay that color. Even a no color wax will darken it some- and may bring out some of the color in the contrasting wood that was replaced at one point. So I am on the search for the right type of wax and also thinking of using a lime wax to keep the lighter look. That wax arrives next week.
The Reveal
Is coming your way next. We are in process of moving these pieces into the house and getting them ready to wax and then share. And I am OBSESSED with how they turned out already so am excited to see them with their finished wax and styling.
You can see one of the REVEALS HERE
Stay tuned for more on that- and for a fun outdoor post coming your way tomorrow.
Happy Wednesday all!
Use an electric toothbruth to get in the nooks and crannies. I have also used an electric face brush. Well worth the investment.
What a great iDea. I am working on a table with all the fancy carving and using an electric toothbrush sounds like a perfect iDea. Thanks!
super idea
You can alo use the electric toothbrush to work the wax into the holes. Test an area first for color match.
Looks like two types of wood. Use a bleach solution. May help even out color. Us the electric toothbrush on dark carvings. Never mix bleach and ammonia.it is toxic.
We were thinking about using the bleach to get an even look too- and the electric toothbrush is such a great idea! Thank you Nancy!
cant wait! it really is messy but the end will be amazing!!!
I love the new lighter shade of wood much better than the darker shade. It is a lot of work but oh so worth it! Looks beautiful! Please let us know what kind of wax you end up using because I am working on a very fancy old french table and want to use the right wax. Thanks!
Will do!! And I am in LOVE with how it is turning out so far too!
I’m in suspense……….what about the beetles ? Lots or none
We didn’t find any active beetles thankfully- but we did find a good bit of beetle damage
it is soo beautiful
I think it is too!
It sounds like a lot of work, but the end result will be worth it. Can’t wait to see what you do with it.
Definitely a lot of work- I had forgotten how much work stripping and re-doing furniture was!
Beautiful pieces. Can’t wait to see the finished result.
Hi Courtney! I really like how the LIGHTER color plays on all the wood carvings and crevices. Very European. Your hard work is paying off. The prize is in the end! Every time you mention your shoulder yelling at you after projects, I feel your pain and worry for you! I have one of those too. Trust me, as you get older, it doesn’t get better. I never used to ice mine, but my physical therapist said that doing so would be my new BFF – and he was right! Heat only aggravates the inflammation. 😉💗
Love the natural finish, especially with your design style ( to tell you the truth the only dark furniture i like these days are the super expensive ones, 😇 Where style and craftsmaNship is perfection. I was a designer till i retired last year and so tired of almost everything. I want to see Perfection and beauty from now on..HA!
So nice indeed
The reveal we all are anxiously awaiting with bated breath!
They are beautiful I so admire your stamina on such a huge project. It looks like it’s going to pay off and be showcase pieces for your beautiful home.
Thank you for sharing.
Karen
Lovely pieces! I admire you for doing this work yourselves rather than hiring it out. You are inspiring!
υεροχο επιπλο με μεγαλη φθορα απο τα σκαθαρια, μπραβο σασ για το κουραγιο να το κανετε μονοι σασ,αξιζε τον κοπο.
περιμενουμε την τελικη εικονα.
συγχαρητηρια!!!!
Odie’s wax is what my furniture restorer uses. It’s dries hard and really protects the wood. Good luck.
Wow! Nice transformation. Loving the look. All good information. Sure learning a great deal from this post and all the comments.
Looking forward to the reveal! I’m sure they’ll be stunning!
Voltaren gel now over the counter has been a life saver for my sore aching limbs. Topical relief so you don’t get stomach upset.
The pieces are looking so good. I really like the lighter more textural look of them.
Great job girl!!
I will look it up! Thank you!
Lucky you courtney. what a gorgeous piece. have to wonder where you will put it in the house. The house looks so great already, but you will probably find just the right spot.
i agree with you and the n0-color wood. i did have a table and mirror that was stripped clean and i didn’t want to change the color so i used mayonnaise and buffed and buffed and it turned out great.
thanks for wharing
Yesterday was my Birthday, so i was a little busy celebrating.
Omg, i can hardly wait To see the revEal, i know, like everything you do, will be fabulous. This pOst taught me a lot about BeEtles and wood.
I am literally working on a project like this right now! (sans beetles) I started trying to sand it in an inconspicuous spot, and found that very uneven. so I got citrustrip and i’m going to slap it on tomorrow. i was hoping for a natural wood finish like so many of your pieces, but had lost hope. I’m anxiously awaiting the result with the wax!!!
Beautiful piece! The result will be worth the effort! WHat do you use to treat the beetles/wood worms?
Thank you. Danielle
A few moons ago I bought an antique from a dealer with “Holes”. Let me forewarn you that powder post beetles (which is what’s in the wood) can get into your other furniture and into the framing of your house.The best way to really get rid of those nasties is to have it fumed. 🙂
Very special! thats 18th century antique french furniture! Worth good money! Try learning how to bleach furniture and use a white wax. Citrastrip was reformulated recently and lost its effectiveness! On old shellac try useing plain rubbing alcohol!